Is the engine done yet?
Spoiler alert: No. However, something else came in the mail.
So, it has been about a month since the last update.
The engine is surely done now, right?
Nope.
It is not.
Because once again, we are waiting for parts. This time it is not an overpriced timing tool or something weird like that, but bearings. Which is somehow even more annoying, because bearings are quite important if you want the engine to go back together properly.
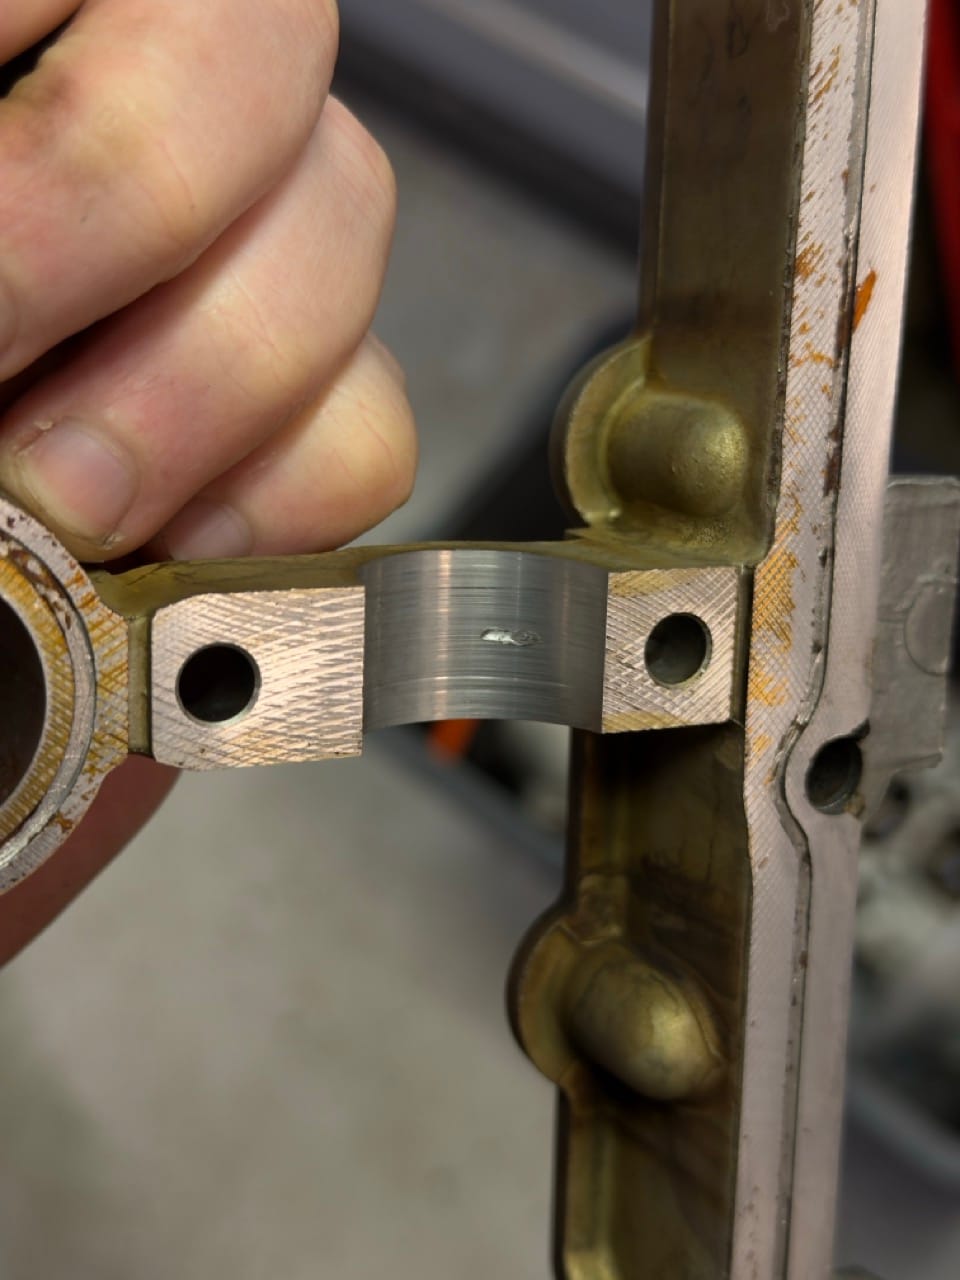
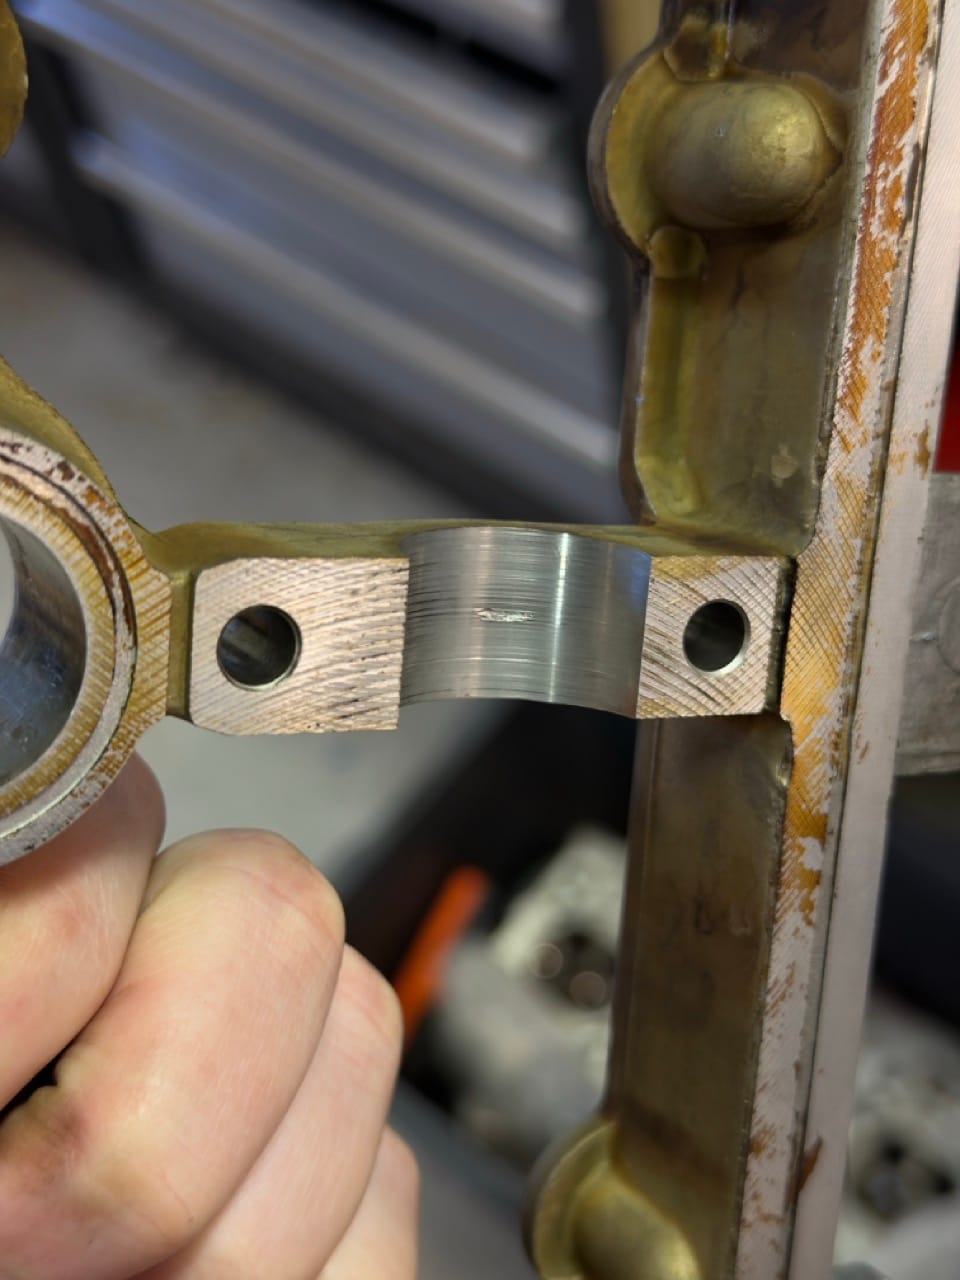
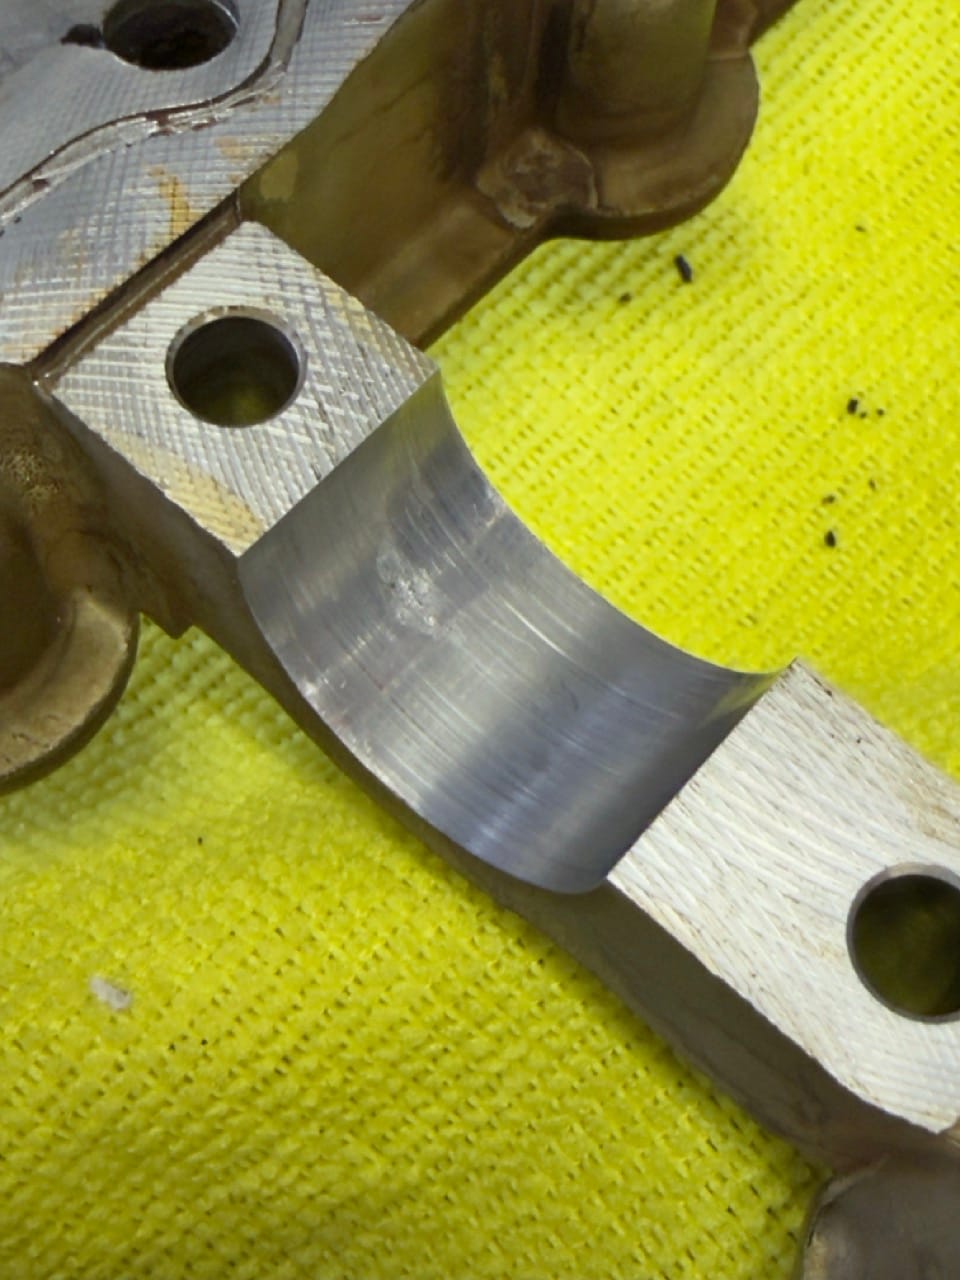
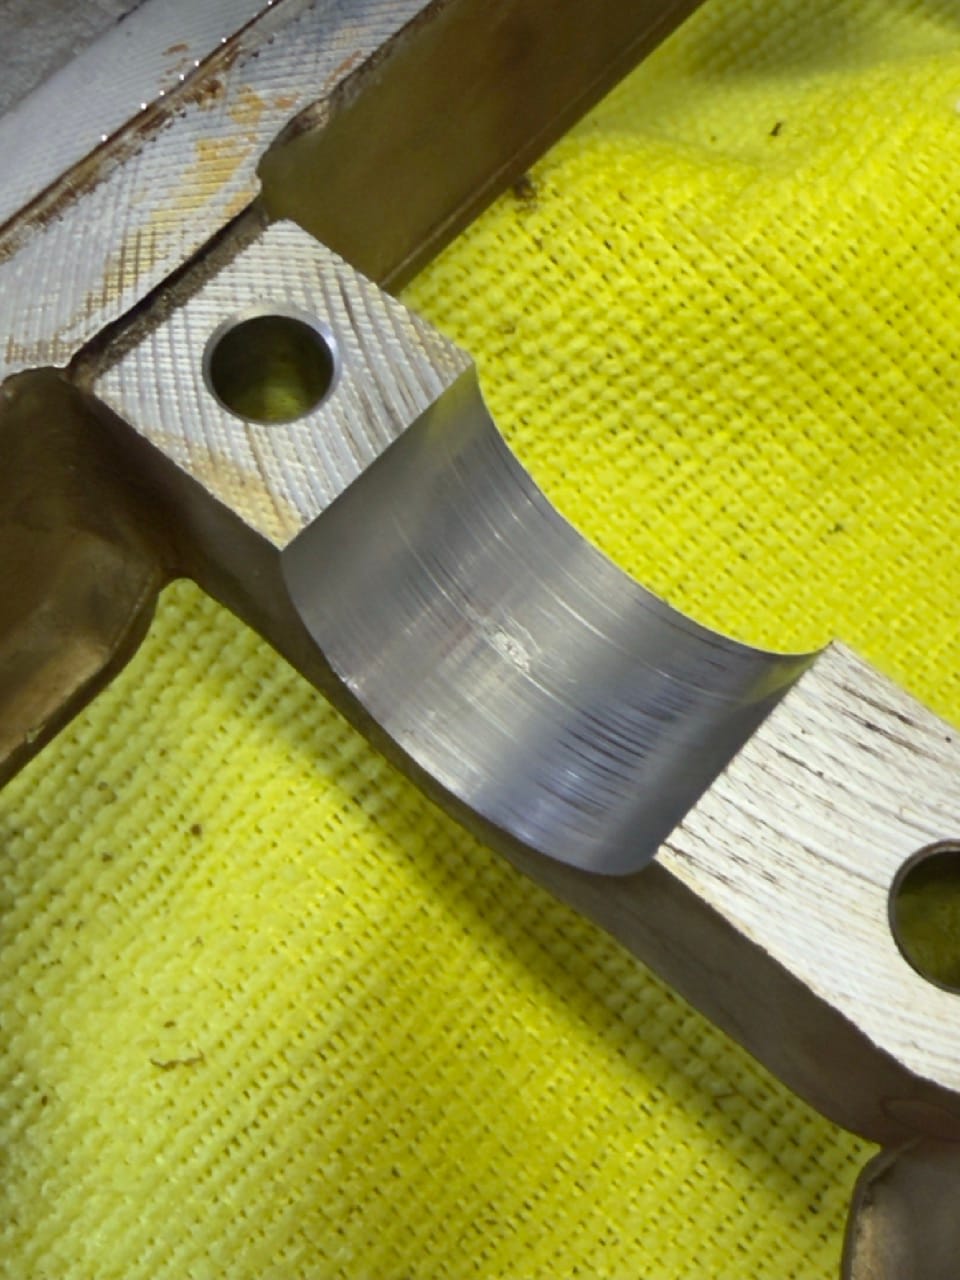
The issue showed up when we checked the bearing clearance with Plastigage. The bearings I had ordered were, unfortunately, not the correct thickness. Not wildly wrong, but wrong enough that they are not going into this engine.
On these engines, the block and crankshaft have markings that tell you which bearing thicknesses are needed. The block has the markings for the lower bearings, and the crankshaft has the markings for the upper bearings. On my engine, the block is marked RRRRR, while the crankshaft is marked BGGGG.
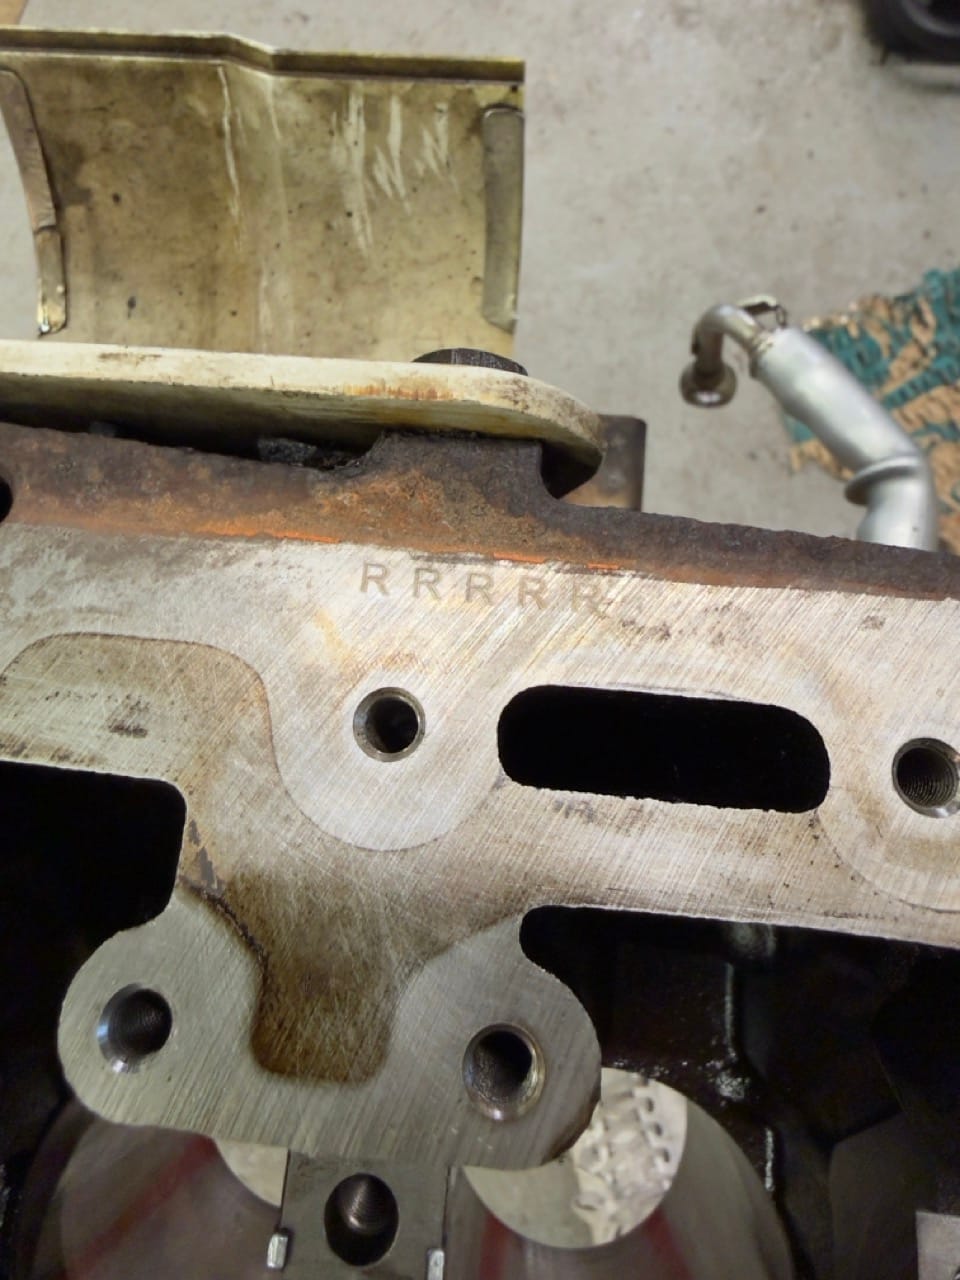
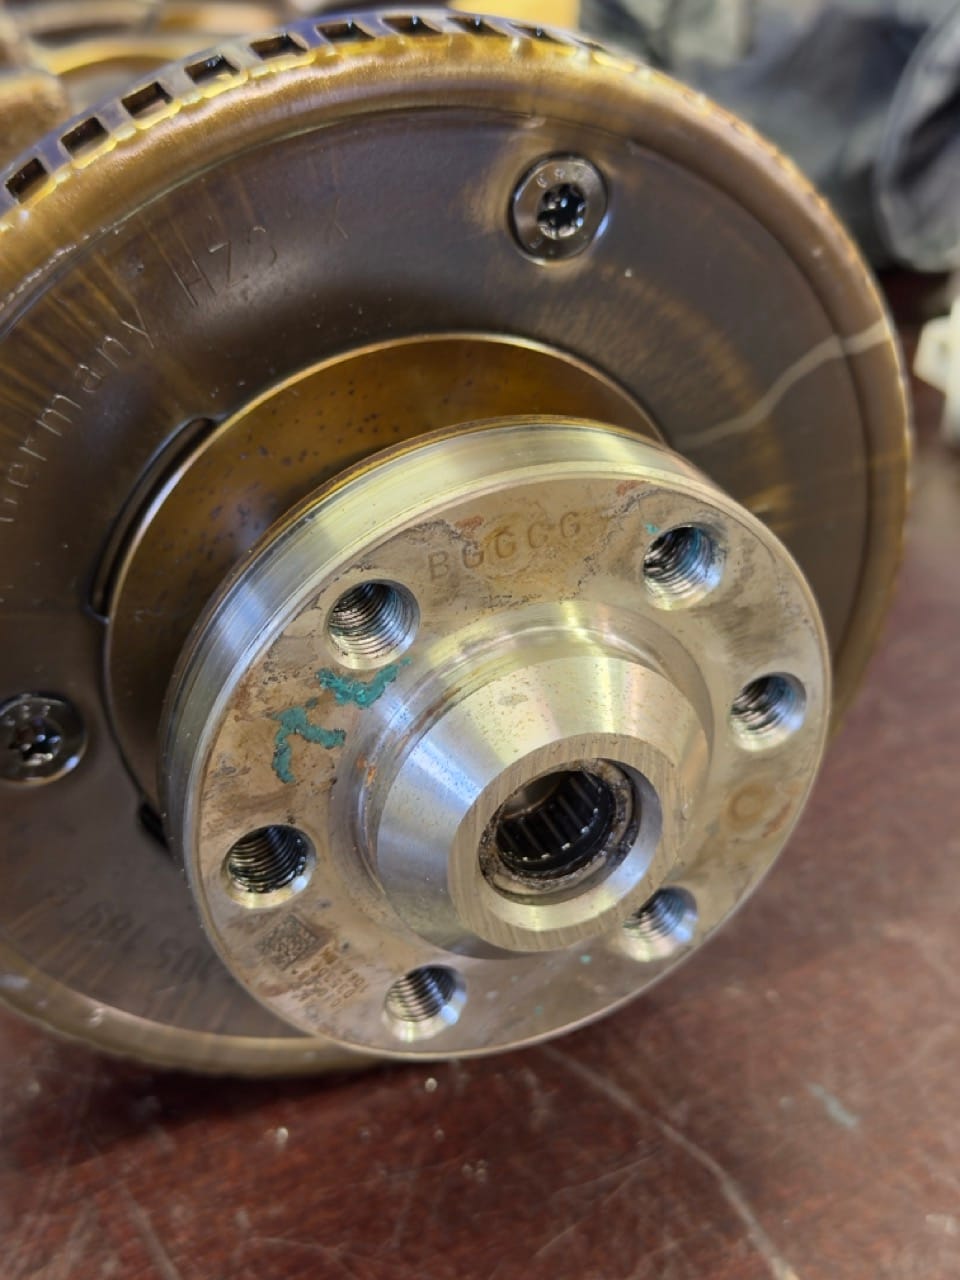
So basically, I need another set of bearings before we can properly start building the bottom end.
Which sucks.
At this point, it has been almost two months since the engine came out, and it still feels like there is not a huge amount of progress to show. A lot has happened, but the engine is still not together, and that is the annoying part. Everything is cleaned, checked, measured, prepared, and then put back on hold because one small but important thing is missing.
That said, the extra time has not been completely wasted.
Since we have been waiting anyway, I have had time to do things properly instead of rushing through it just to get the car back together. Everything is being cleaned, checked, lubricated, torqued to spec, and generally treated the way it should be treated when you are already this deep into an engine.
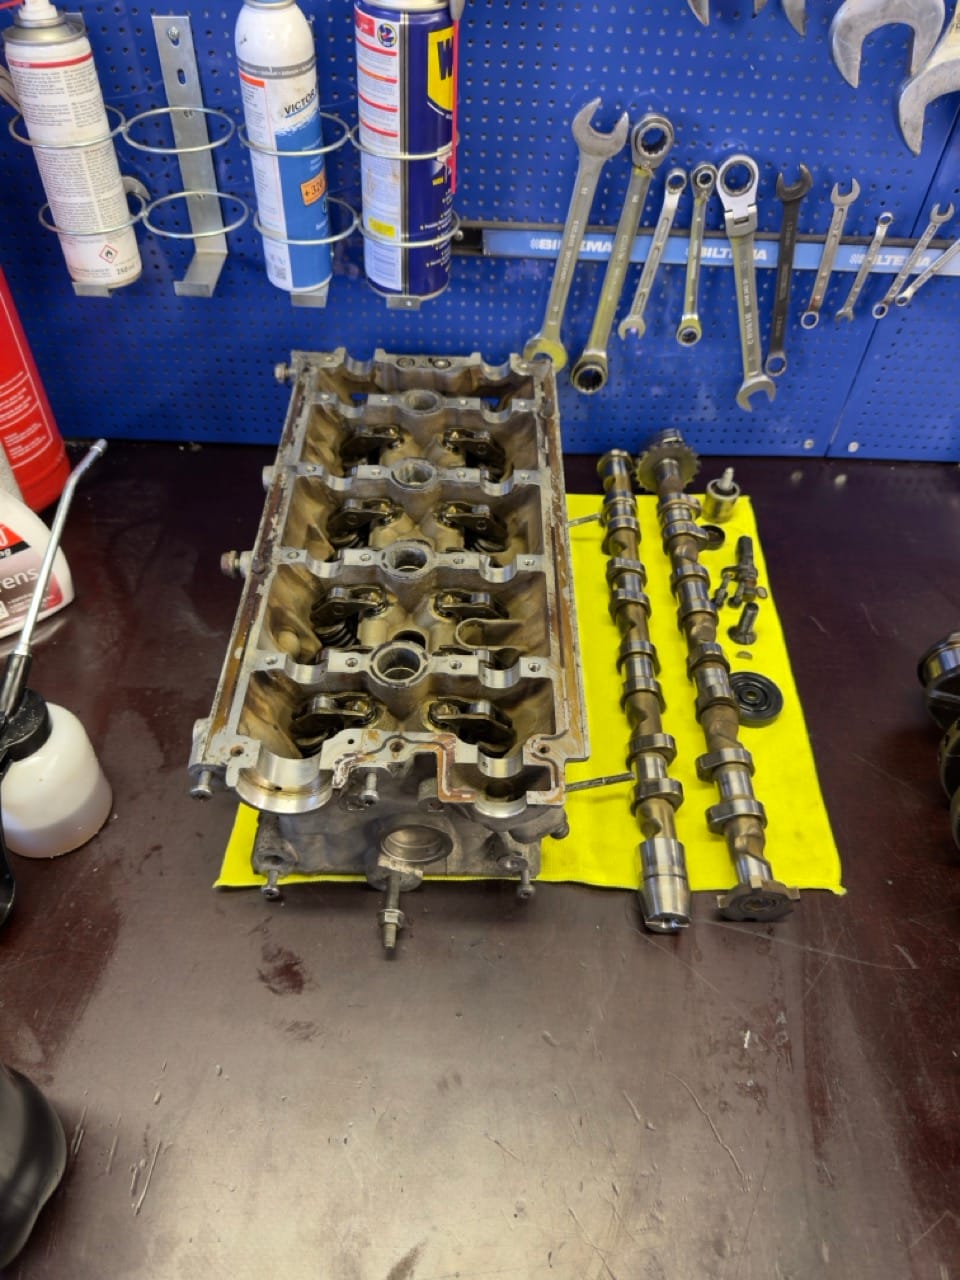
The cylinder head is now assembled, which is at least one proper milestone.
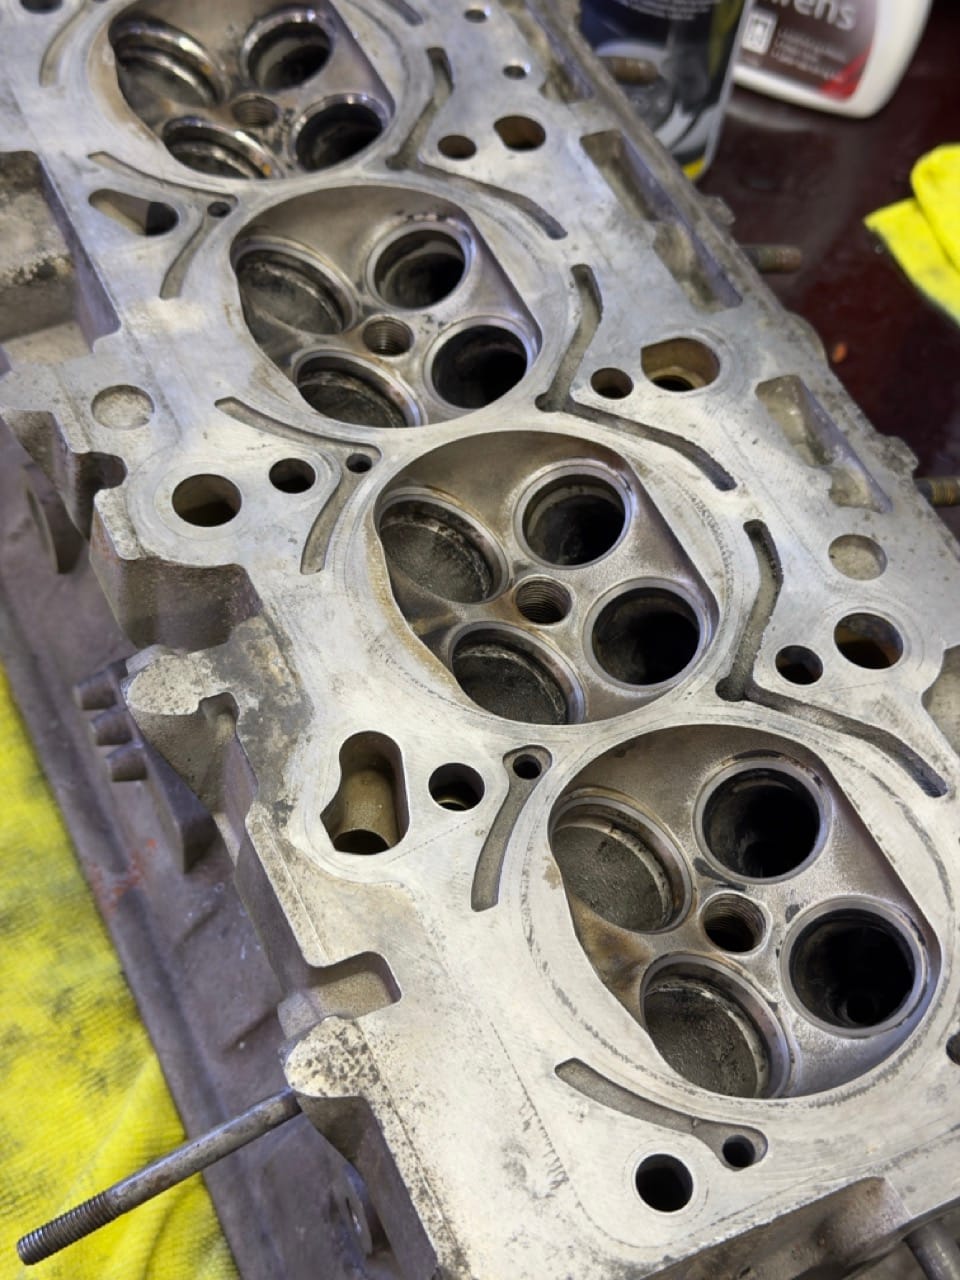
But before assembling it, it needed a lot of cleaning.
I took the cylinder head home and started cleaning off all the old sealant and carbon buildup. There was quite a bit of it, and I was being very careful because the last thing I wanted to do was scratch something or make more work for myself later. I did not do the most aggressive job at home, mostly because I was scared of damaging anything, but I got a decent amount of the annoying old stuff off.
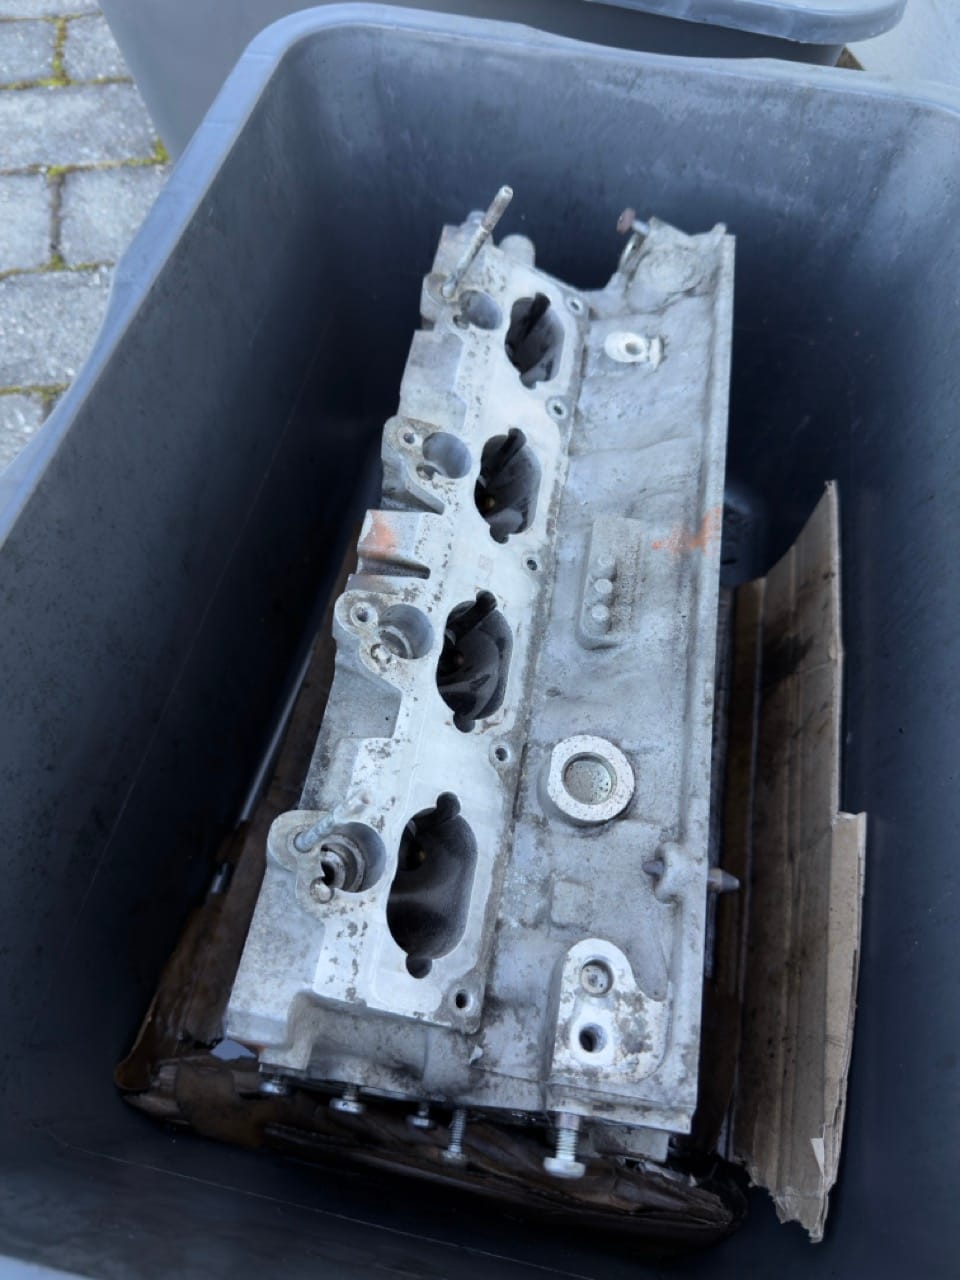
Then I power washed it properly.
That helped a lot, because the head was filthy in all the usual places. Old oil, old sealant, carbon, general engine grime, all of it. Power washing made it look a lot more like something that could actually go back on the engine, instead of something that had just been pulled out of a 160,000 km oil burner.
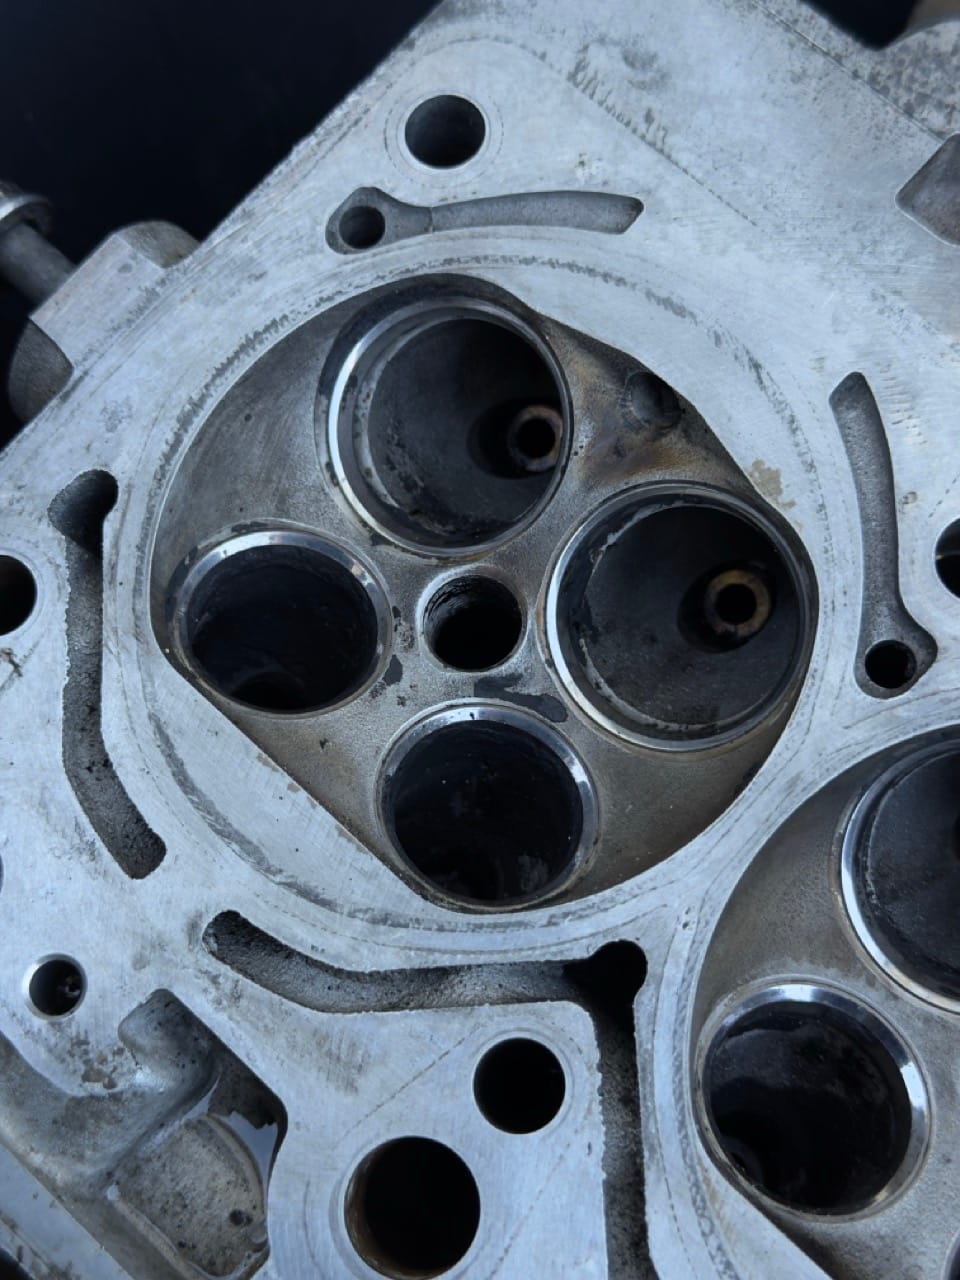
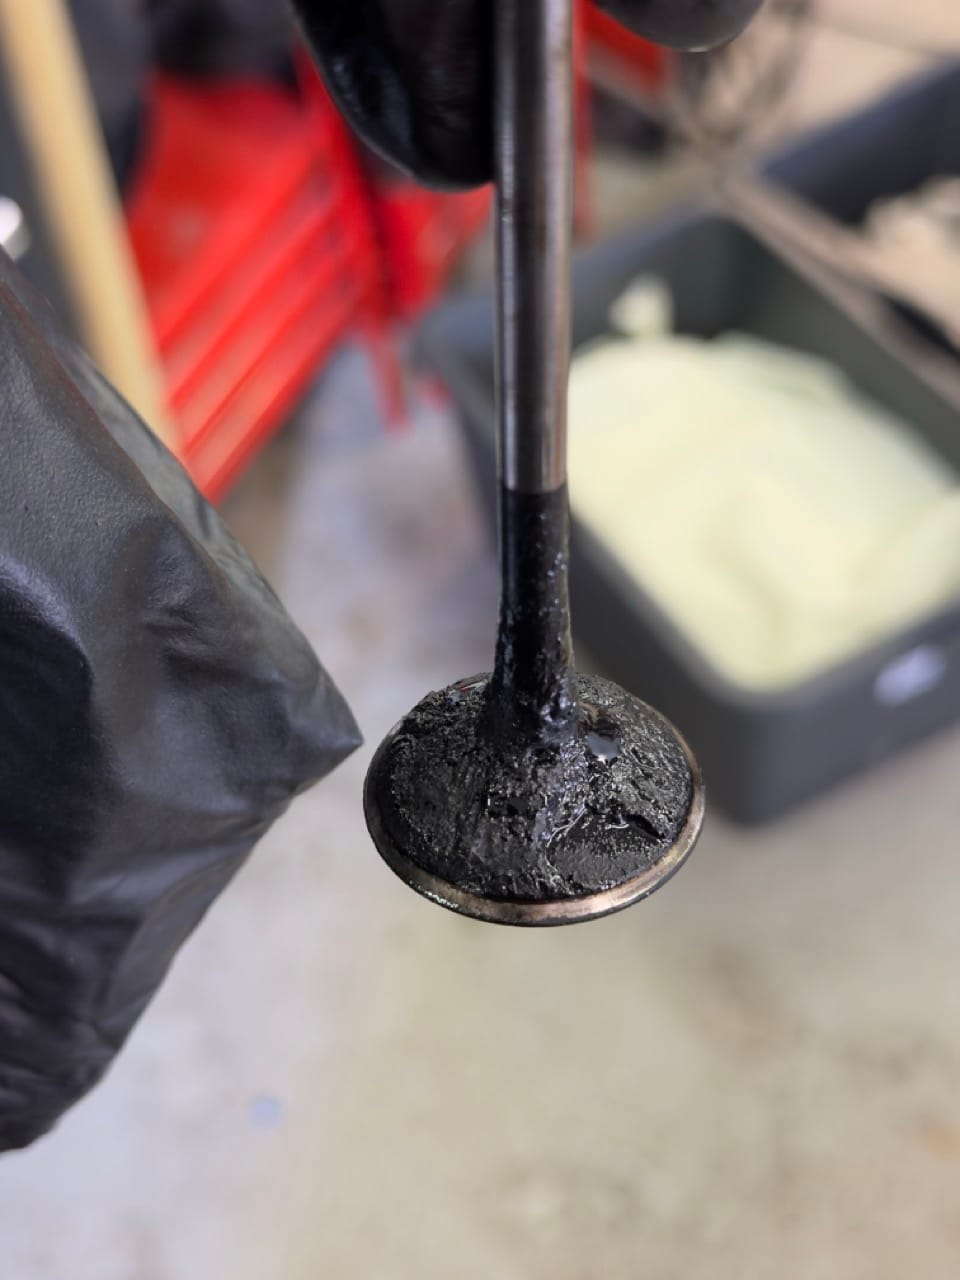
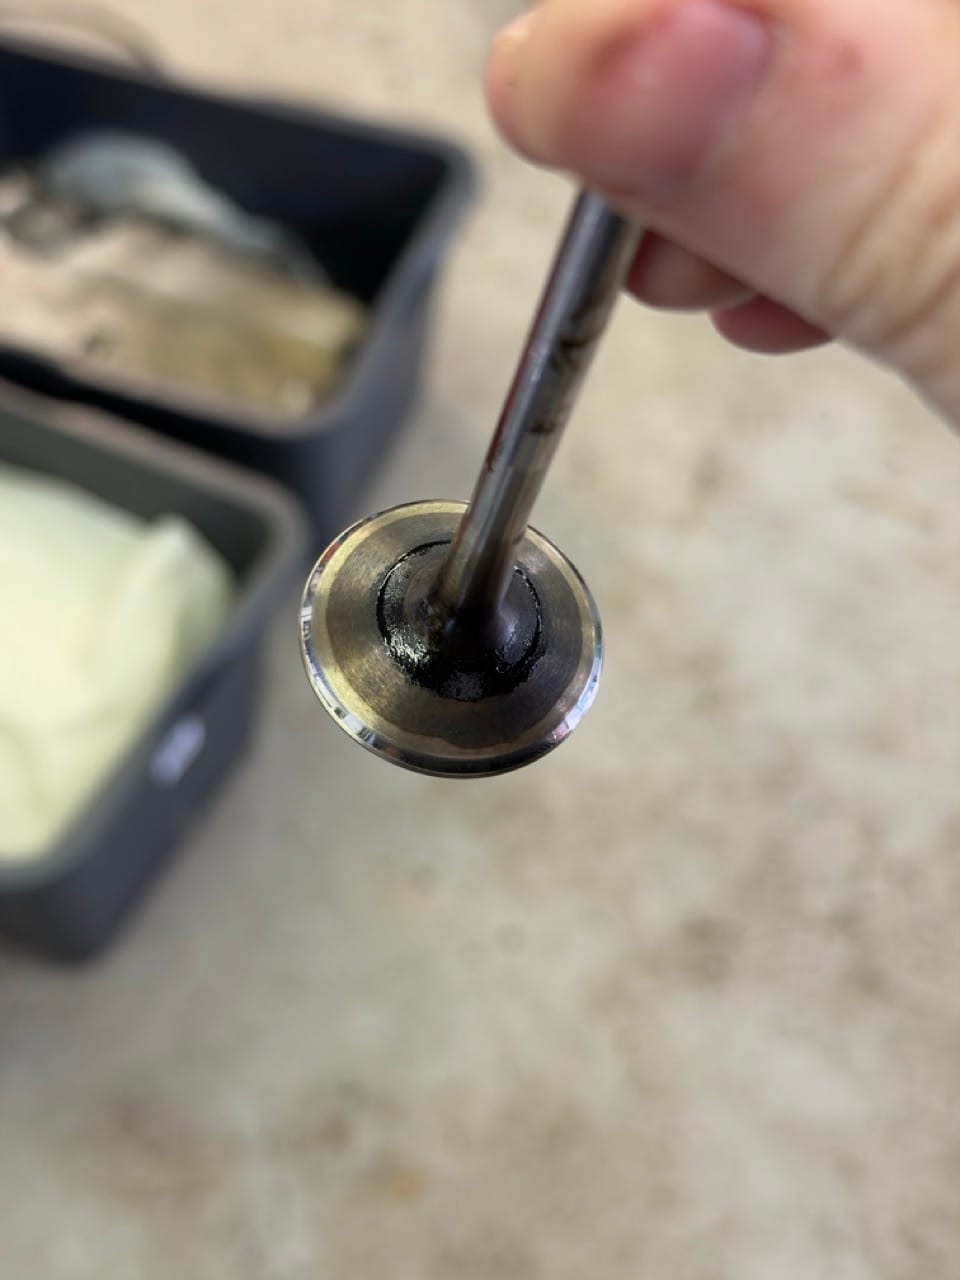
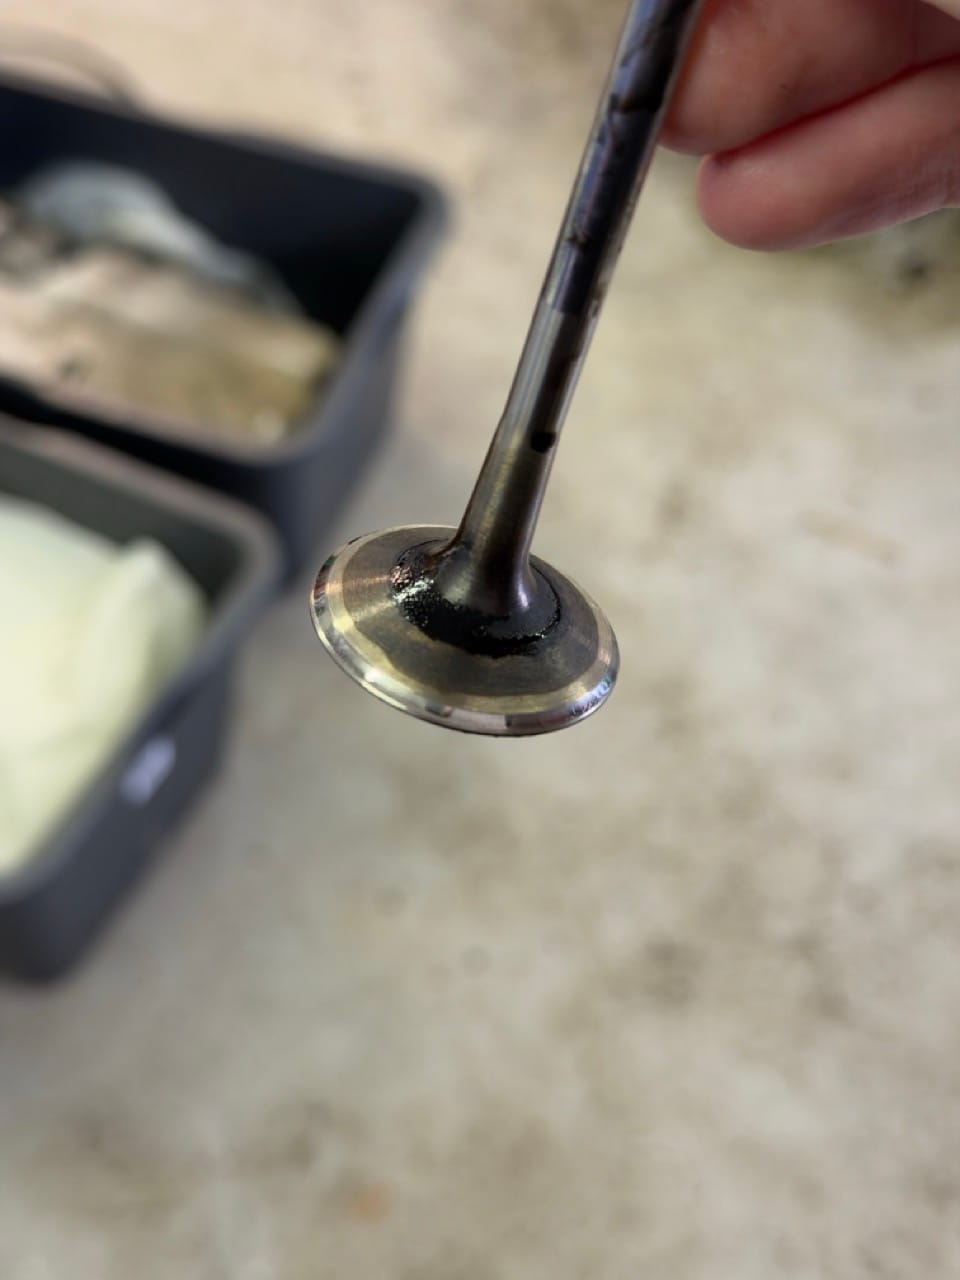
The valves were even worse.
They were absolutely covered in carbon. Not just a thin layer either, but proper buildup. I was honestly surprised they did not leak, because some of them looked terrible. Same with the inlet plates, which were also completely caked in carbon.
I did not use Mr Muscle on the cylinder head. Instead I used Plumbo oven and grill cleaner, which turned out to be strong enough to loosen the carbon so I could pick it off. It still was not exactly quick though. I think I went through six or seven rounds before I was finally happy with them.
Spray, wait, scrape, rinse, inspect, repeat.
Very exciting stuff.
But it worked. The carbon slowly started coming loose, and eventually the valves cleaned up really nicely. I have some before and after photos of them, because the difference is pretty satisfying. Before cleaning, they looked like they had been living inside a chimney. After cleaning, they actually looked like valves again.
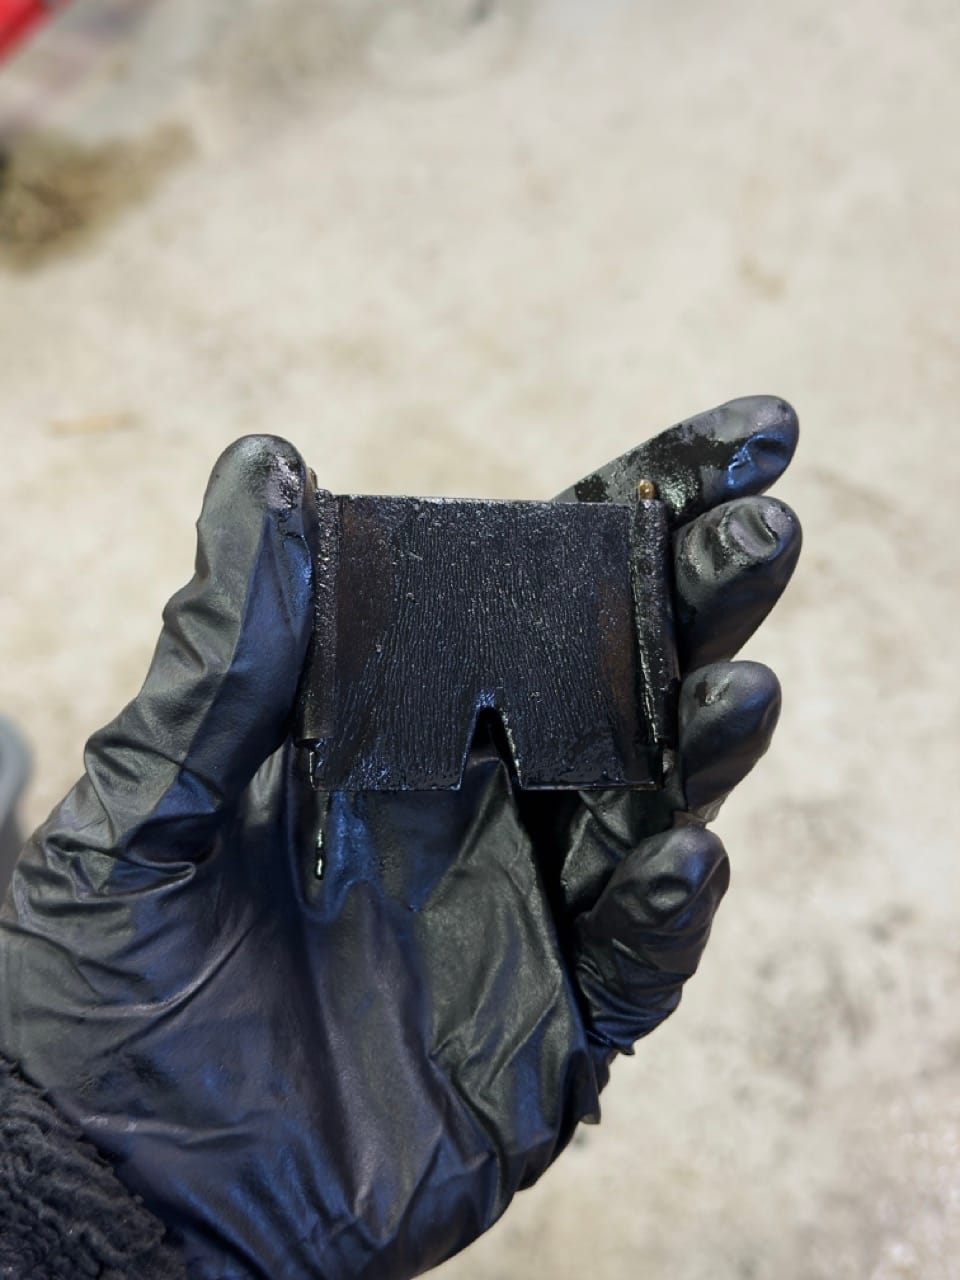
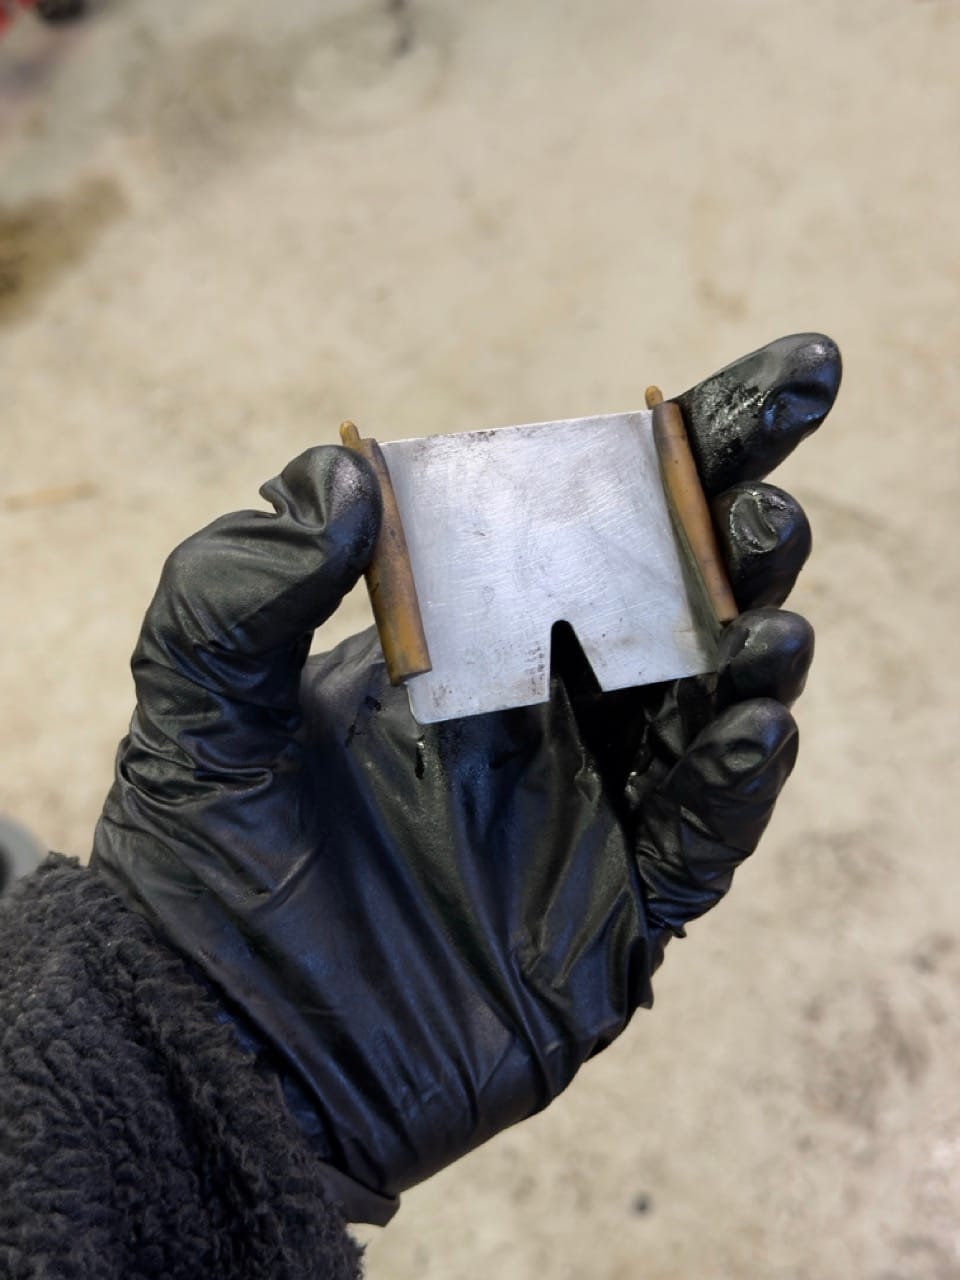
The inlet plates were the same story. Covered in carbon, cleaned up nicely in the end.
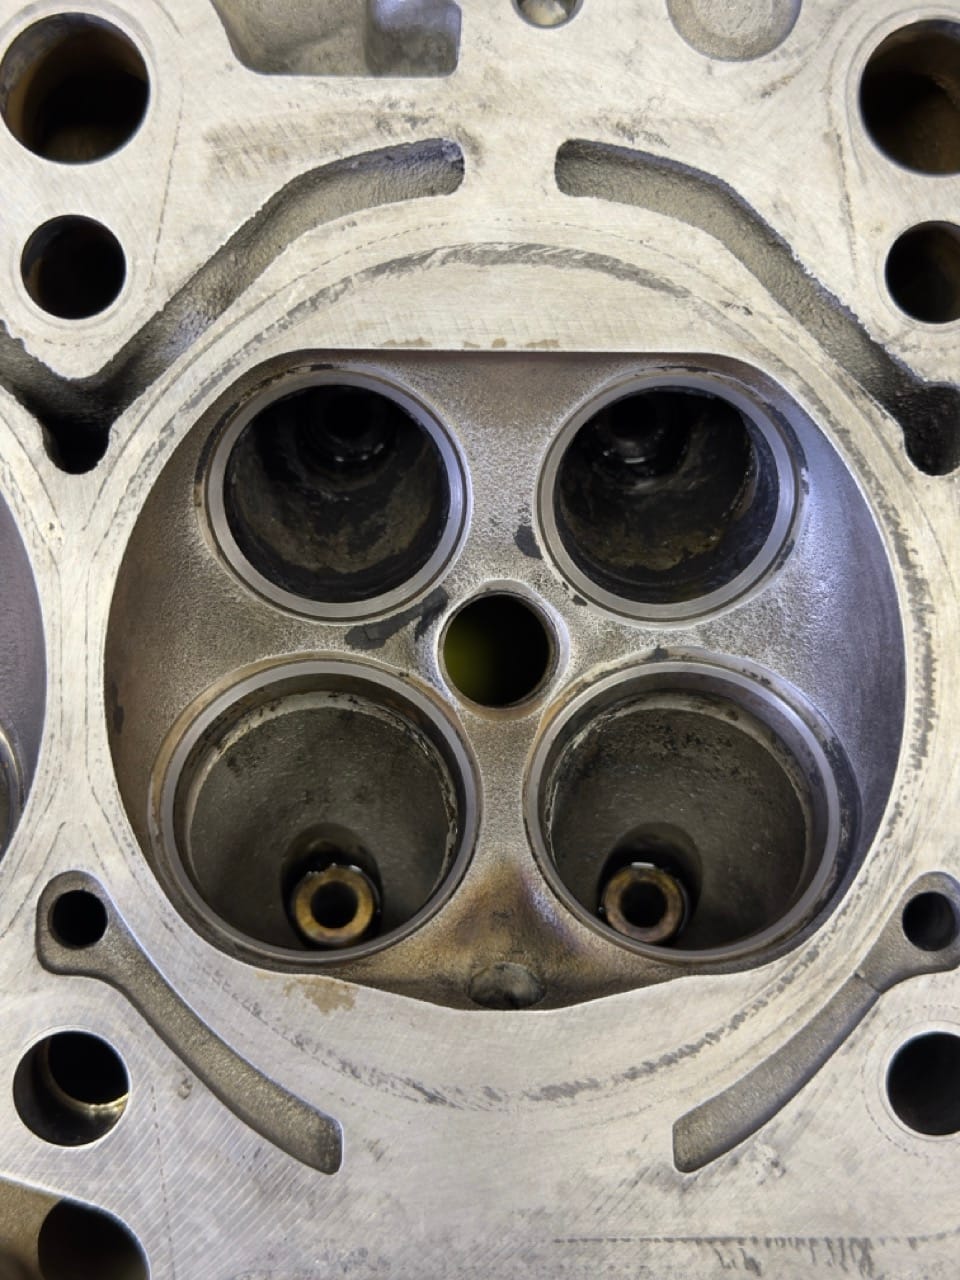
Once the valves were done, I gave the cylinder head one final proper clean and made sure there was no more old sealant left on it. At the workshop I had a bit more confidence than I did at home, so I could be more thorough without feeling like I was about to ruin the whole thing.
And then, of course, the big bad wolf appeared.
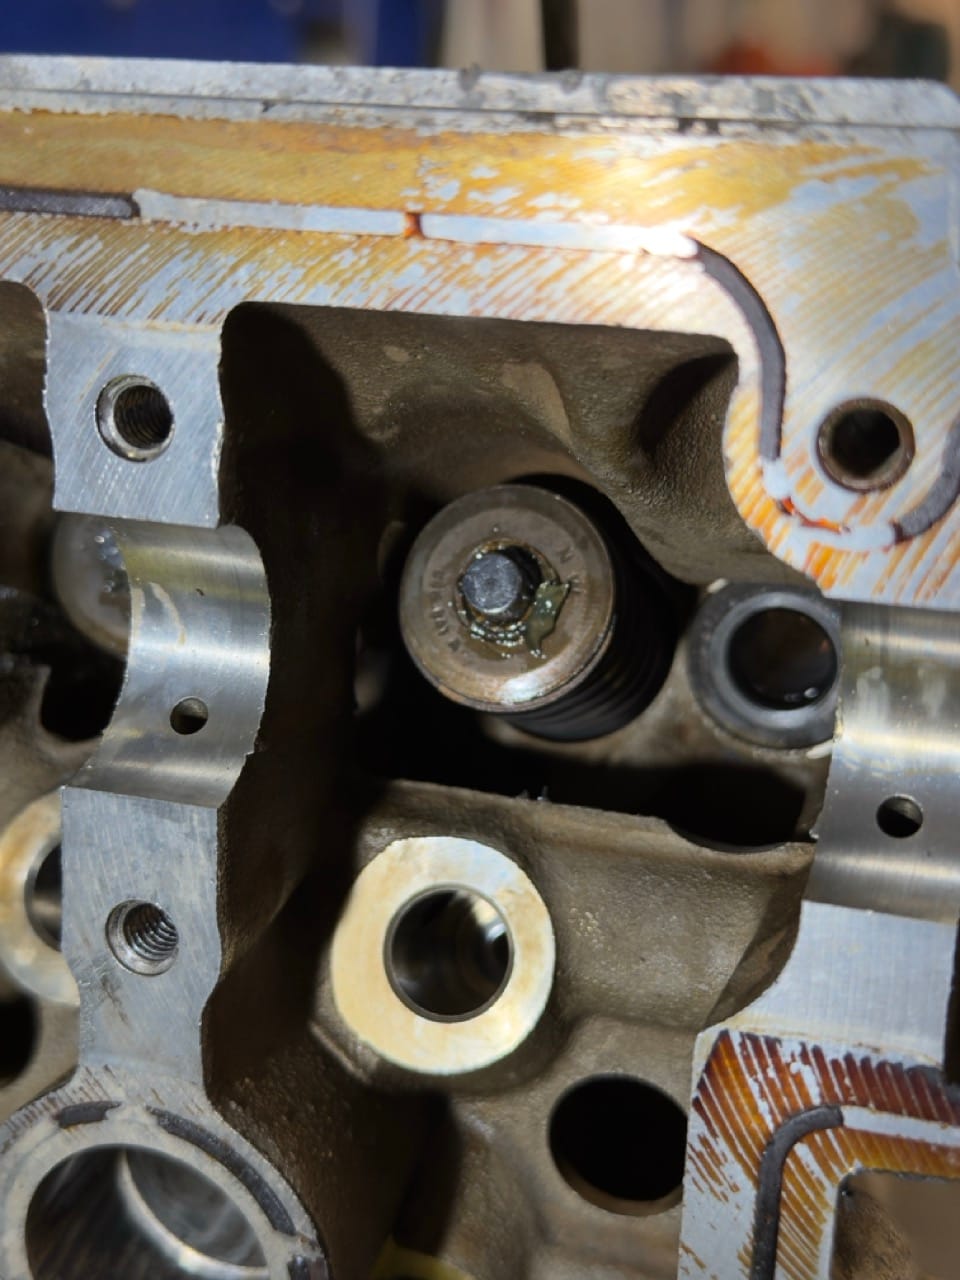
While inspecting the head, we noticed two marks where the camshafts sit. Basically, the metal bearing surface that holds the camshaft in place had two actual marks in it. Not scorch marks or discoloration, but proper physical marks, like something had been dropped on it or scratched it deeply.
Not exactly what you want to see.
The camshafts also have marks in the same area, so something must have happened at some point. We believe it has probably always been there, or at least been there for a long time, because the engine has clearly been running like this already.
Luckily, it did not seem to be anything major.
We smoothed the marks out carefully with a razor blade, just enough to remove the raised edges and make sure nothing would catch. It was one of those moments where your stomach drops for a second because you suddenly imagine needing a new cylinder head, but after checking it properly it seemed fine.
Not ideal, but not a disaster.
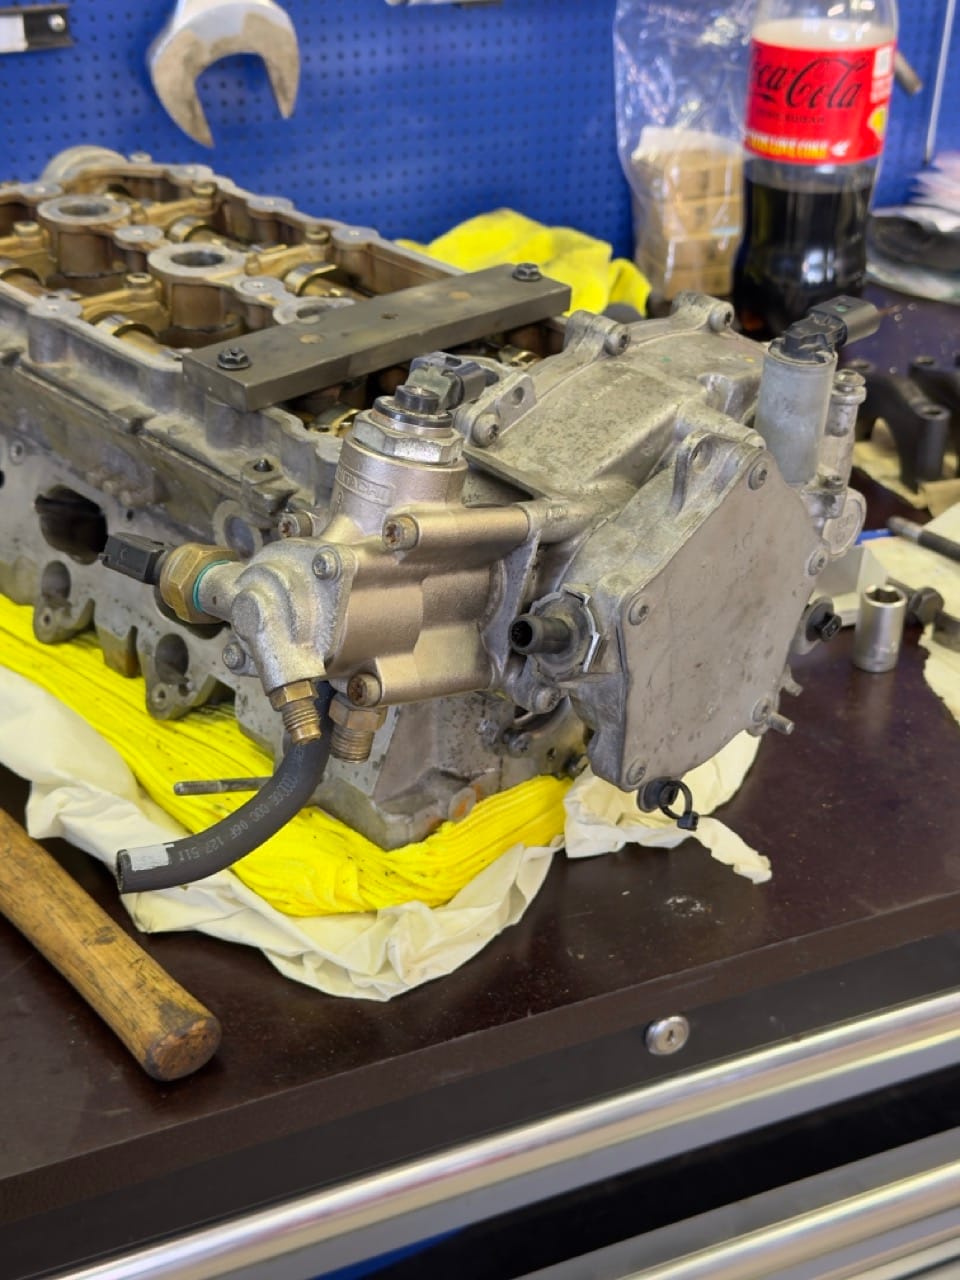
With all that sorted, it was finally time to assemble the head.
I followed the official Volkswagen repair manual from Erwin pretty much 1:1, which has honestly been one of the best things I have bought for this whole job. Having all the torque specs, minimum and maximum values, assembly order, measurements, and general factory information available makes the whole process feel a lot less like guessing and a lot more like actually doing it correctly.
It is such a clutch thing to have.
It also means that, at least in theory, everything should be going back together exactly as Volkswagen intended. Every bolt is torqued properly, every clearance is checked, and every step is being done with the correct information in front of us instead of relying on random forum posts and half-remembered YouTube videos.
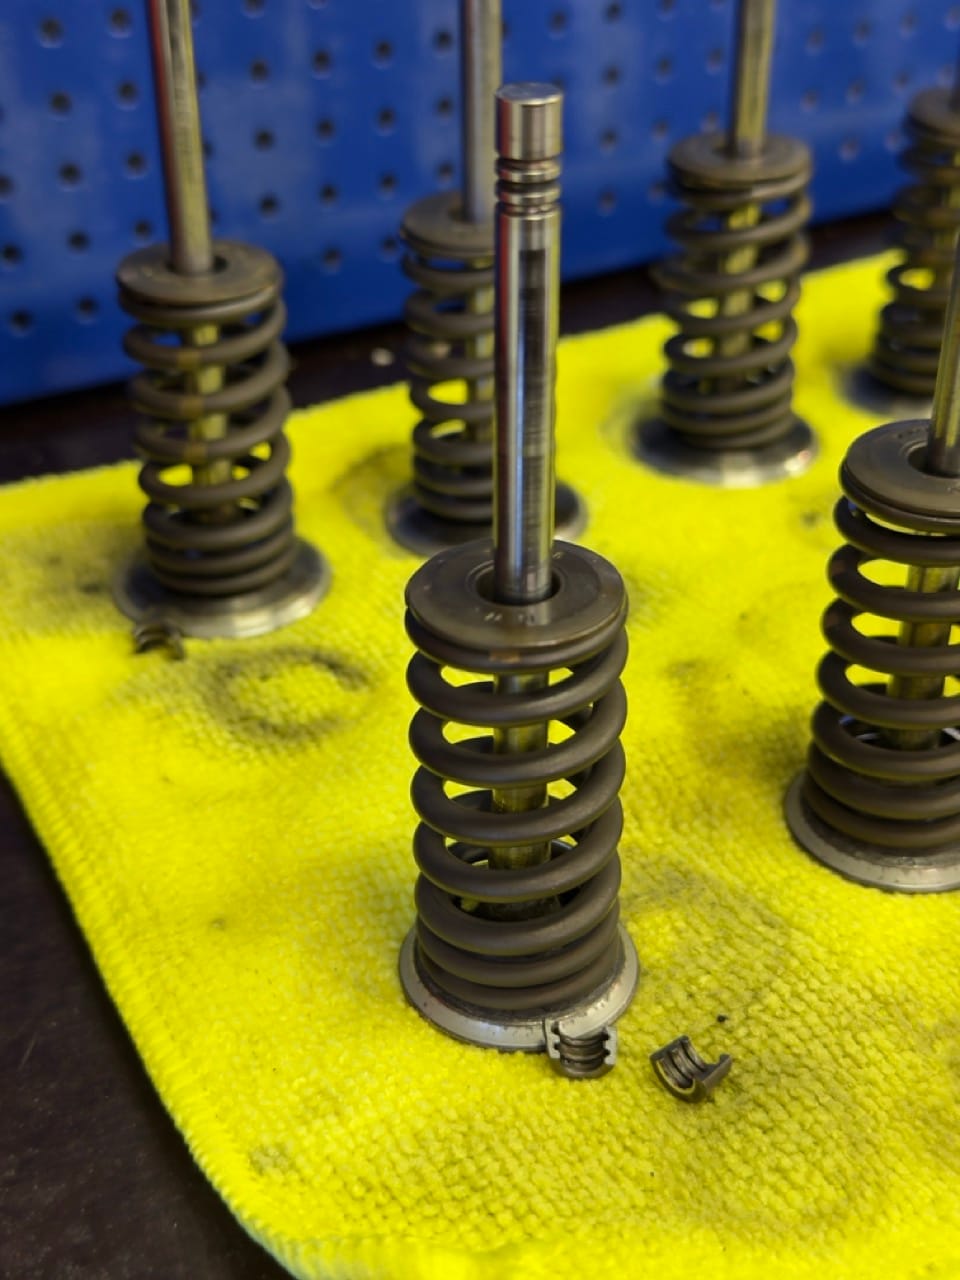
Installing the valves, springs, retainers, and everything else was actually pretty straightforward. A bit fiddly at times, but nothing too bad. The hydraulic lifters were even easier, since those basically just need to be cleaned, lubricated, and placed back where they belong.
Like most of this rebuild, the actual mechanical work is not always the hard part. The hard part is usually cleaning everything properly, making sure nothing gets mixed up, and not doing something stupid when you are tired.
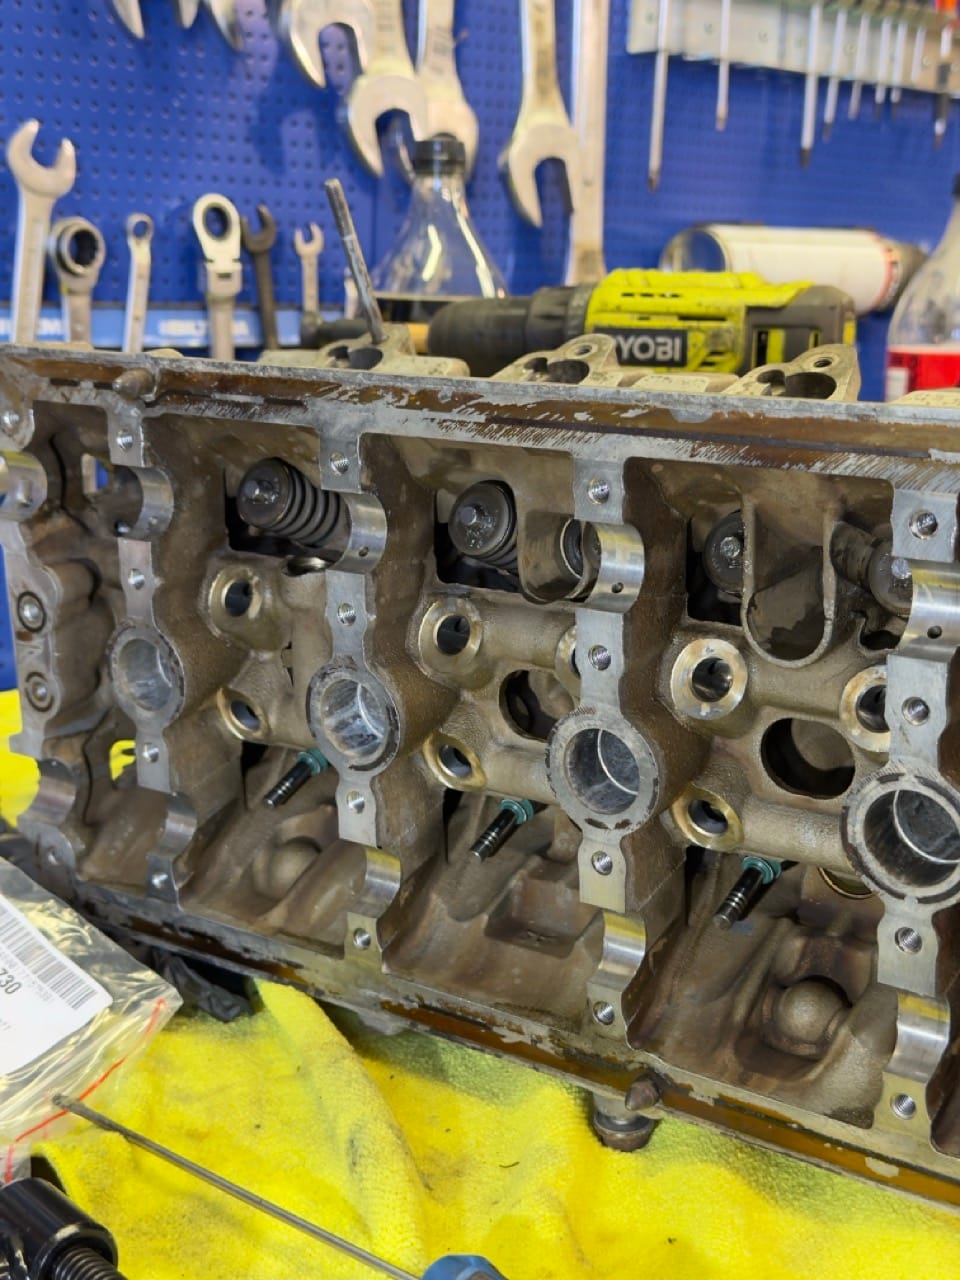
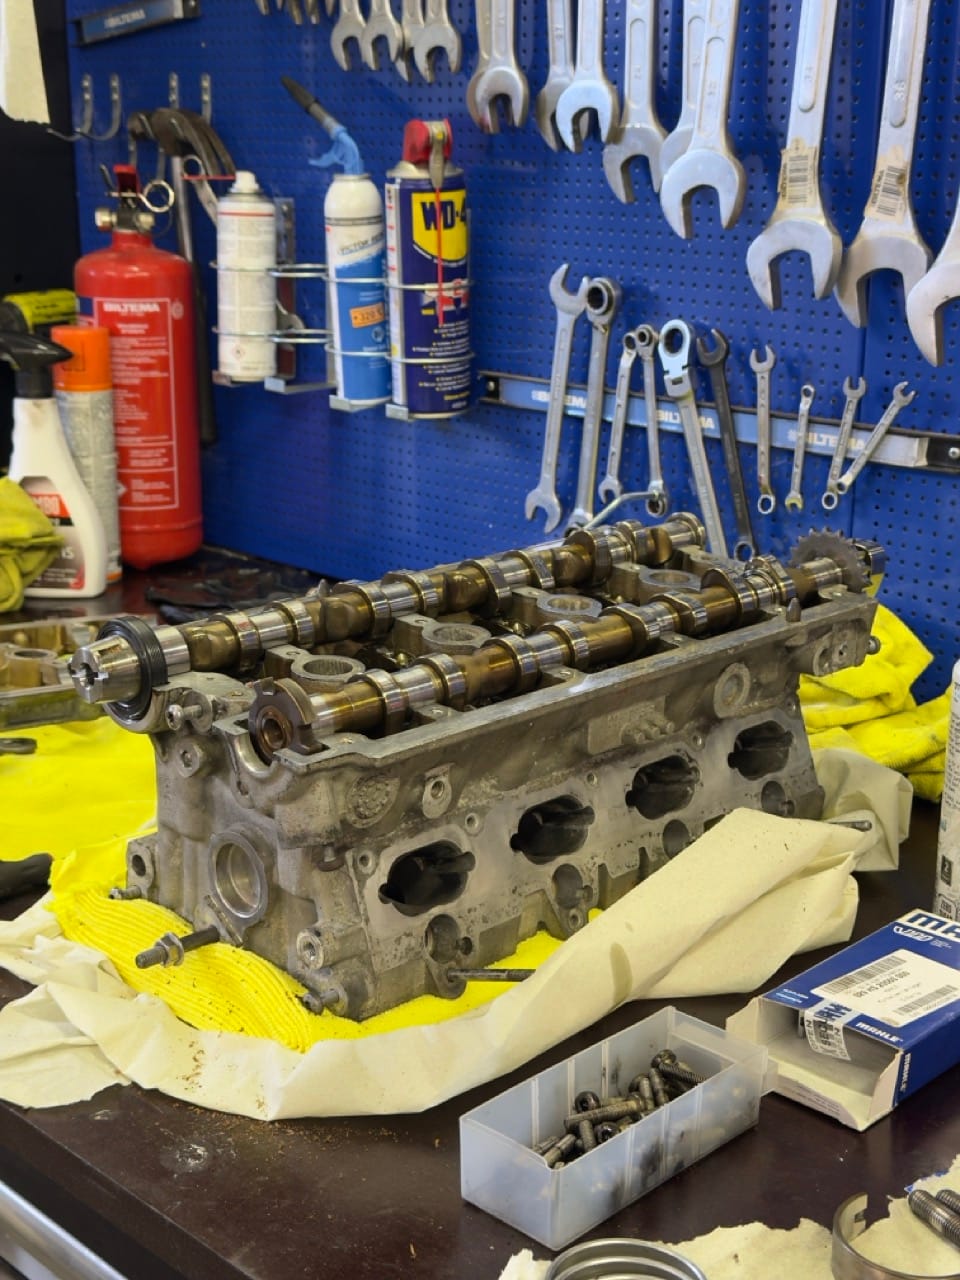
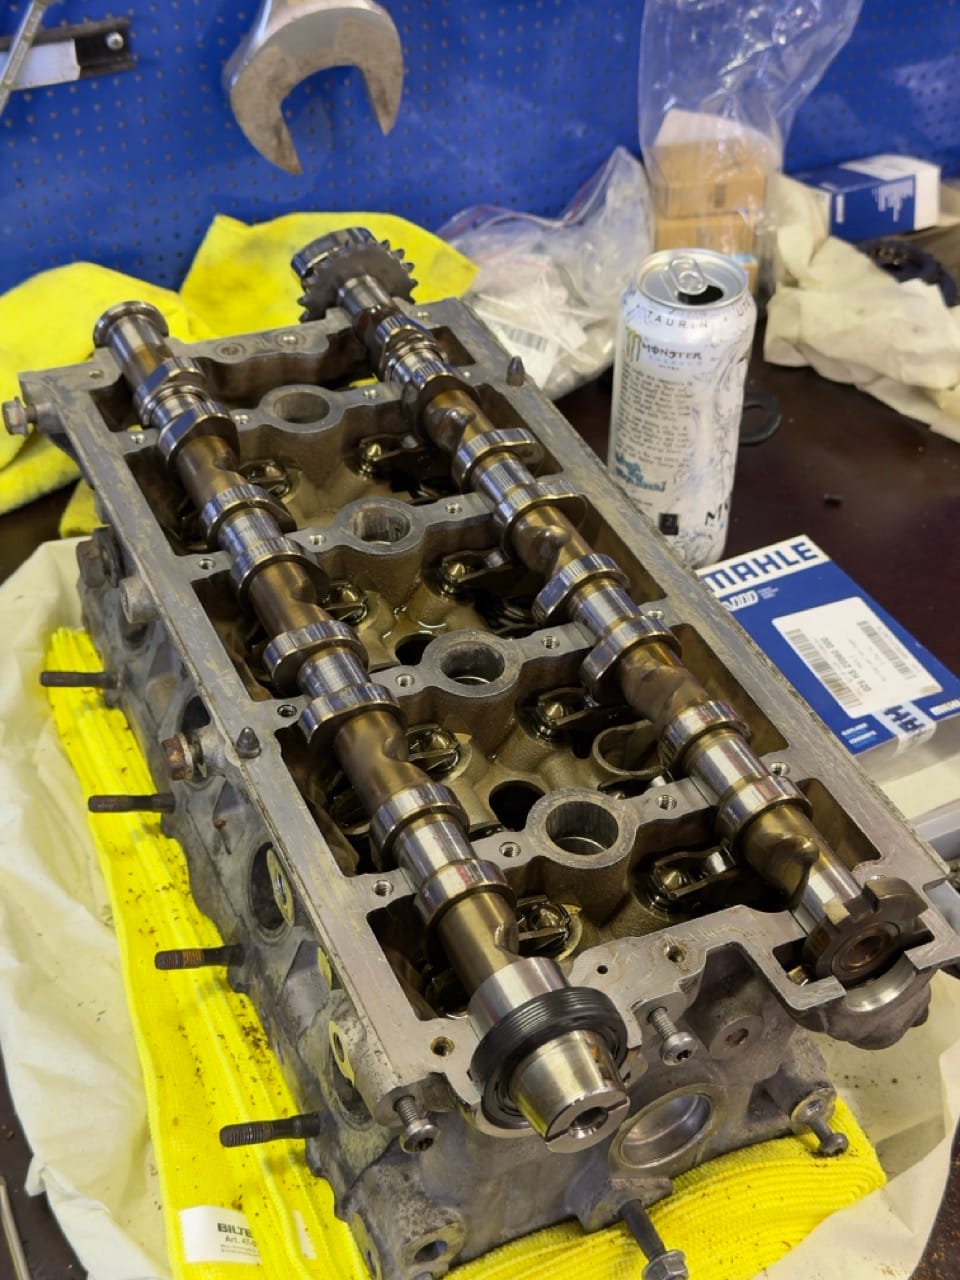
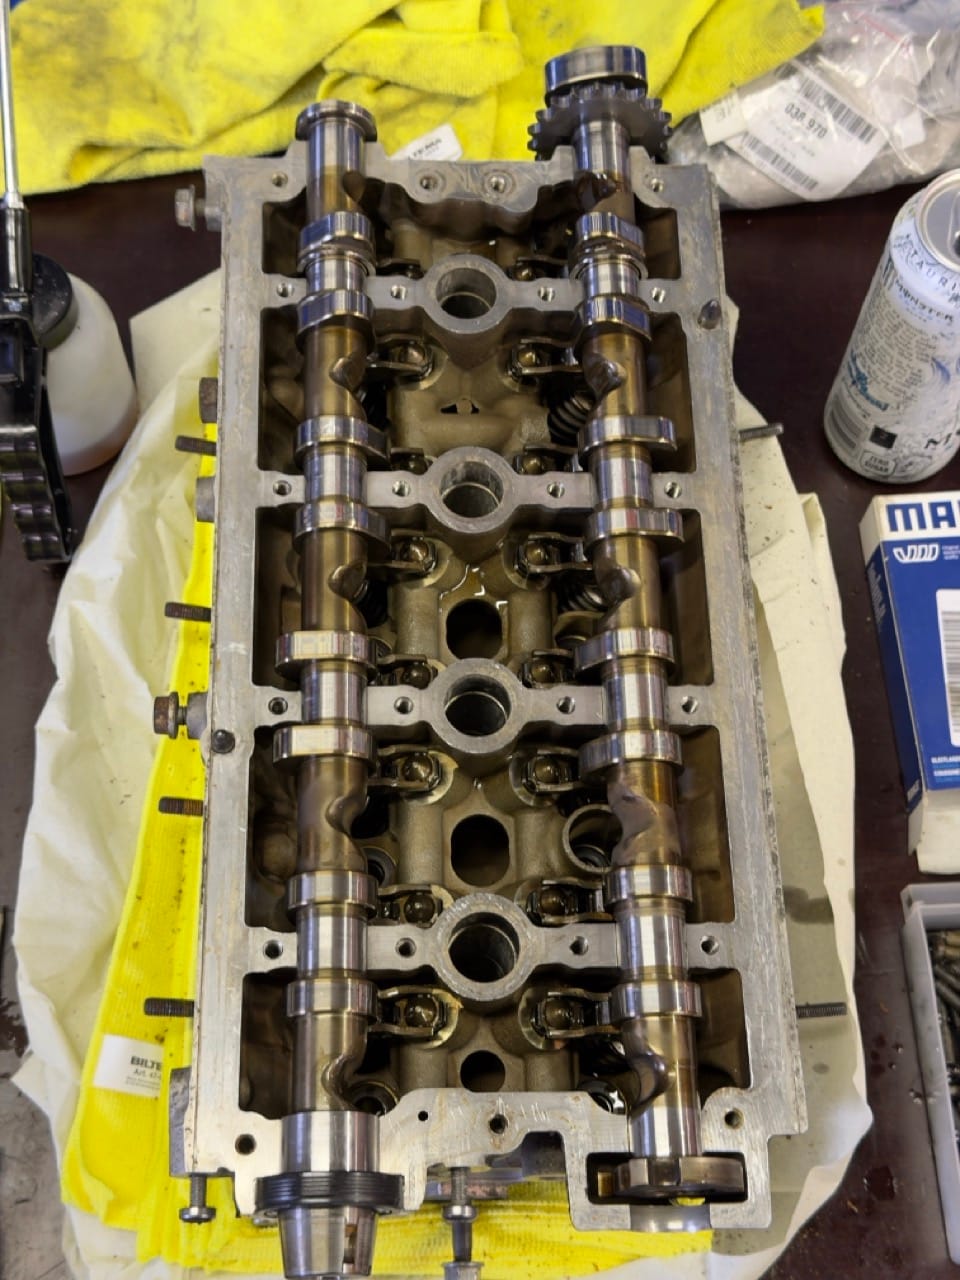
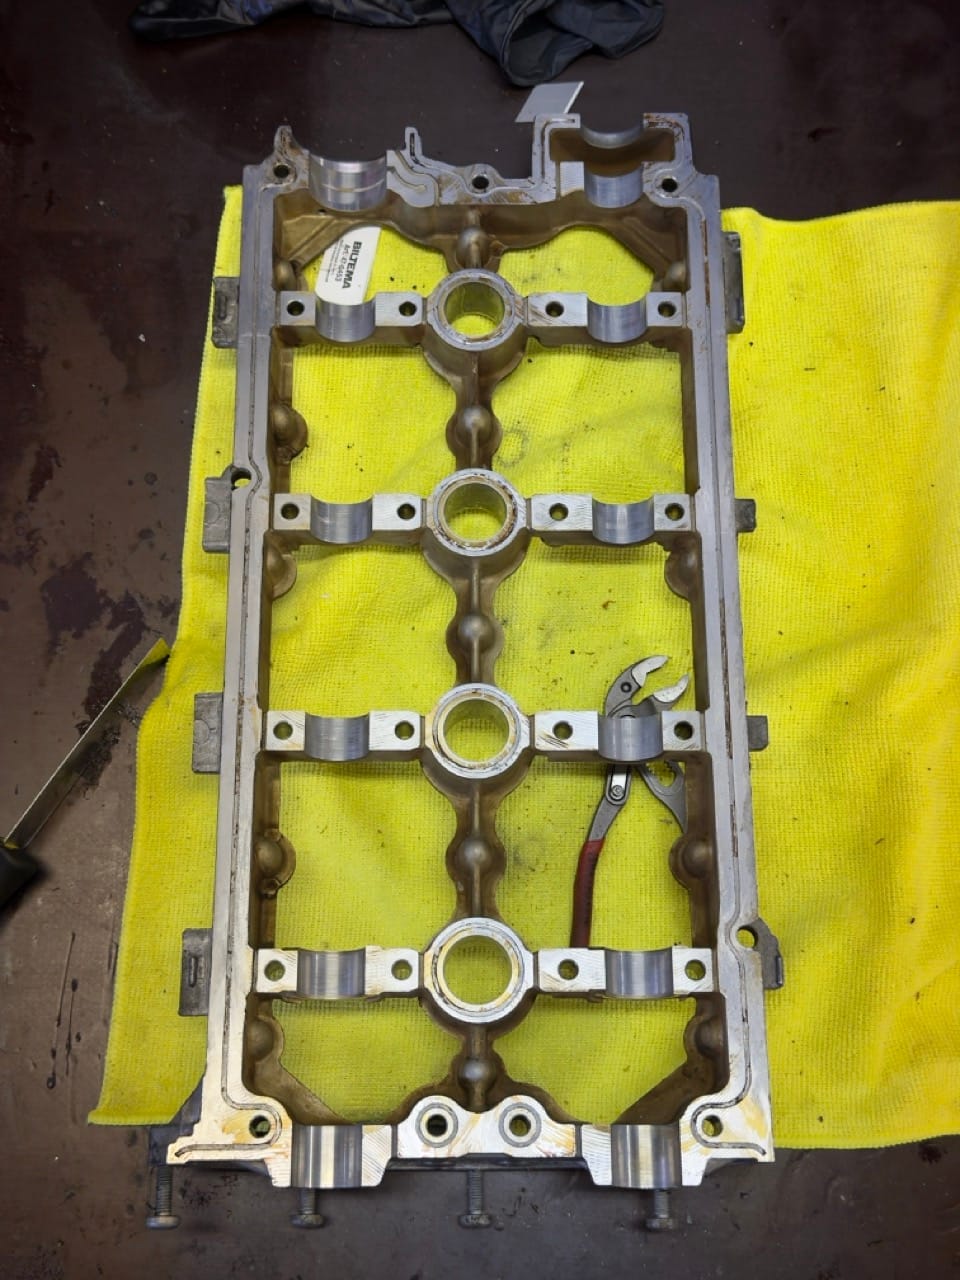
Once the valves and lifters were in, the next job was installing the camshafts and sealing up the head cover, or camshaft housing, or whatever the correct name is. I am sure Volkswagen has a very specific name for it, but you get the idea.
Before installing the camshafts, I also removed the cog for the belt side. This does not have to be installed while assembling the cylinder head, since it can go back on later when the belt is installed. The reason I removed it was because I wanted to replace the oil seal behind it while everything was already apart.
Which made sense.
Until it did not.
You are supposed to use a special Volkswagen tool for this job. We had something that was sort of similar, but not quite the correct tool. And apparently that cog was really, really stuck in place, because when I tried removing it, two of the arms literally broke off.
So that was nice.
The good news is that I did manage to replace the oil seal, which was the whole reason for removing the cog in the first place. The bad news is that I now had to order a new cog as well.
Luckily it is not really a big deal. The cog does not need to be installed until we get to the belt side anyway, so the cylinder head could still be assembled without it. It is just another part added to the waiting list, because apparently that is the theme of this rebuild.

So I had to order that as well.
Which means, yes, we are waiting for that too.
The timing chain itself is actually quite hard to install completely wrong, but we still followed the proper guide for it. There is a specific method where you count the chain links and line everything up correctly between the marked points. I am not going to pretend this is a full timing guide, because there are already plenty of those online, but basically you count the links, line up the marks, and make sure the teeth sit where they are supposed to sit.
Very scientific.
After that, the tensioner went on, the chain went on, the camshaft sprocket went on, and everything started to look a bit more like an engine again instead of just a pile of clean aluminium parts on a bench.
Then it was more scraping, more cleaning, removing old sealant from the timing cover area, applying new sealant, and fitting the cover back on. Again, nothing especially dramatic, just slow and careful work. The cover bolts were torqued to spec as well. I believe they were 10 Nm, but either way, the manual was used and everything was tightened properly.
Small torque numbers always feel slightly wrong when you are used to bigger bolts, but that is also exactly why using the manual matters. Guessing is how you strip things.
I also installed the high pressure fuel pump with a new O-ring. The bolts were tightened to spec, and the fuel pipe connections were also tightened properly according to the manual. I do not know if calling them pipes, outlets, or inlets is technically correct, but they are attached, they are clean, and they are torqued correctly.
That is the important part.
The vacuum pump also went back on with a fresh O-ring, because there is no point reusing old seals when everything is already apart. Same with the camshaft position sensor O-ring. It probably would have been fine, but replacing it now takes almost no time, and I would rather not find out later that a tiny old rubber seal decided to leak after the engine is back in the car.
I also ordered new fuel lines and installed the small fuel line for the HPFP with a new clamp. Not the most exciting part of the rebuild, but brand new parts always feel good. They look good, they fit properly, and there is something satisfying about replacing old, tired bits with fresh ones when the engine is already on the stand.
Another nice thing about being stuck waiting is that I have had time to clean everything properly.
There is still more I could do. I could go full obsessive mode and soak all the aluminium parts in solvent, scrub every little corner, and make everything look brand new. But honestly, I probably will not go that far. I might clean the outside of the engine a bit more before it goes back in the car, but I doubt I will turn it into a showpiece.
This is still a car I want to drive, not a museum display.
Somewhere in the middle of all this, we also went for the annual drive to Drammen for the VACN and Mobile car meet.
Since my car is still very much not driving anywhere, I shotgunned in my friend’s Audi RS3 in Ara Blue, which is honestly such a good colour. It was a nice drive, and also a good break from staring at engine parts and waiting for packages.

I took a few photos of some other cars at the meet, including my friend’s Bora R32, which is apparently one of one in Norway. Very cool car, and definitely not something you see every day.
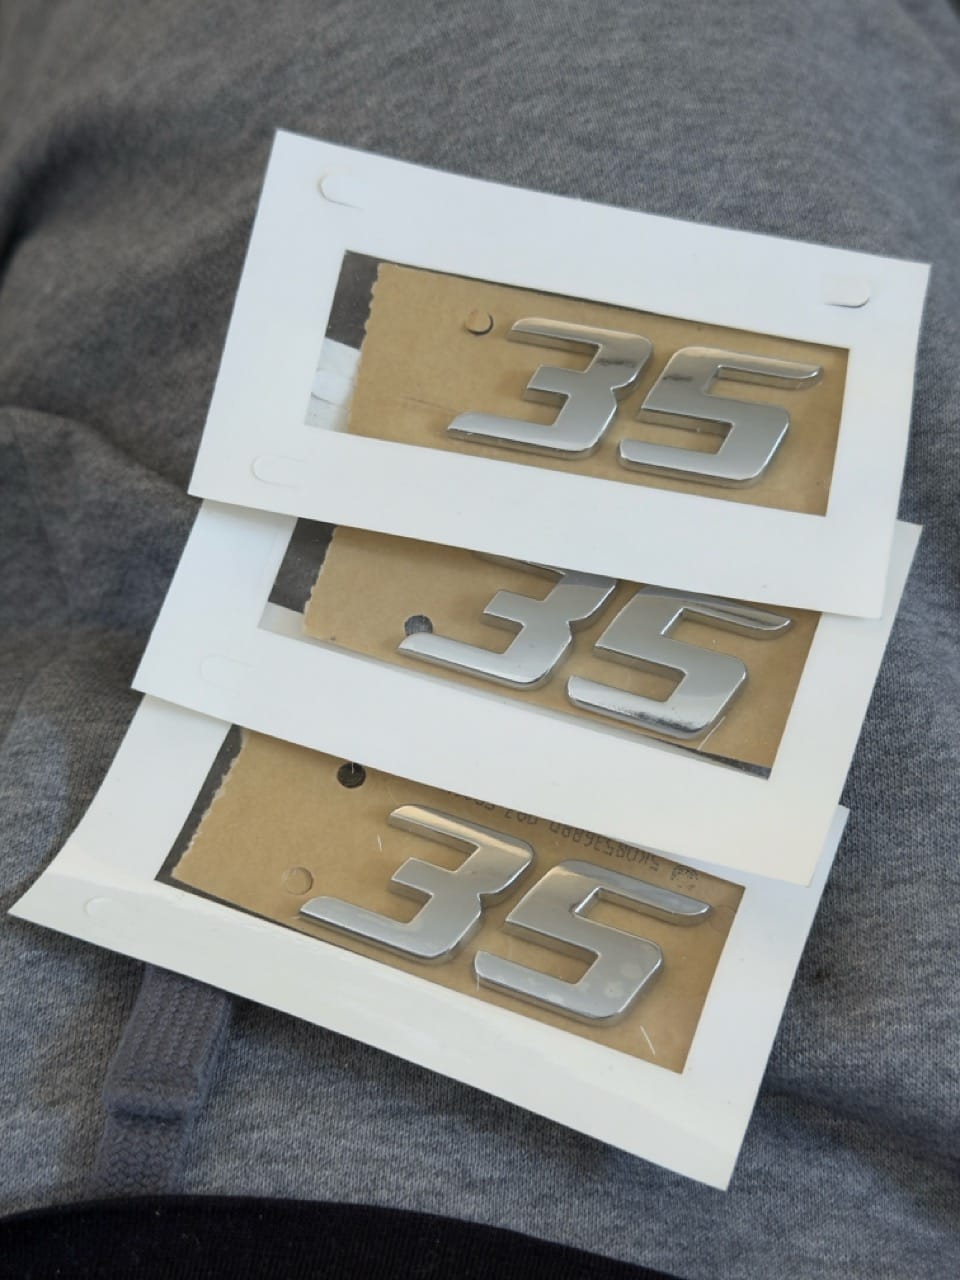
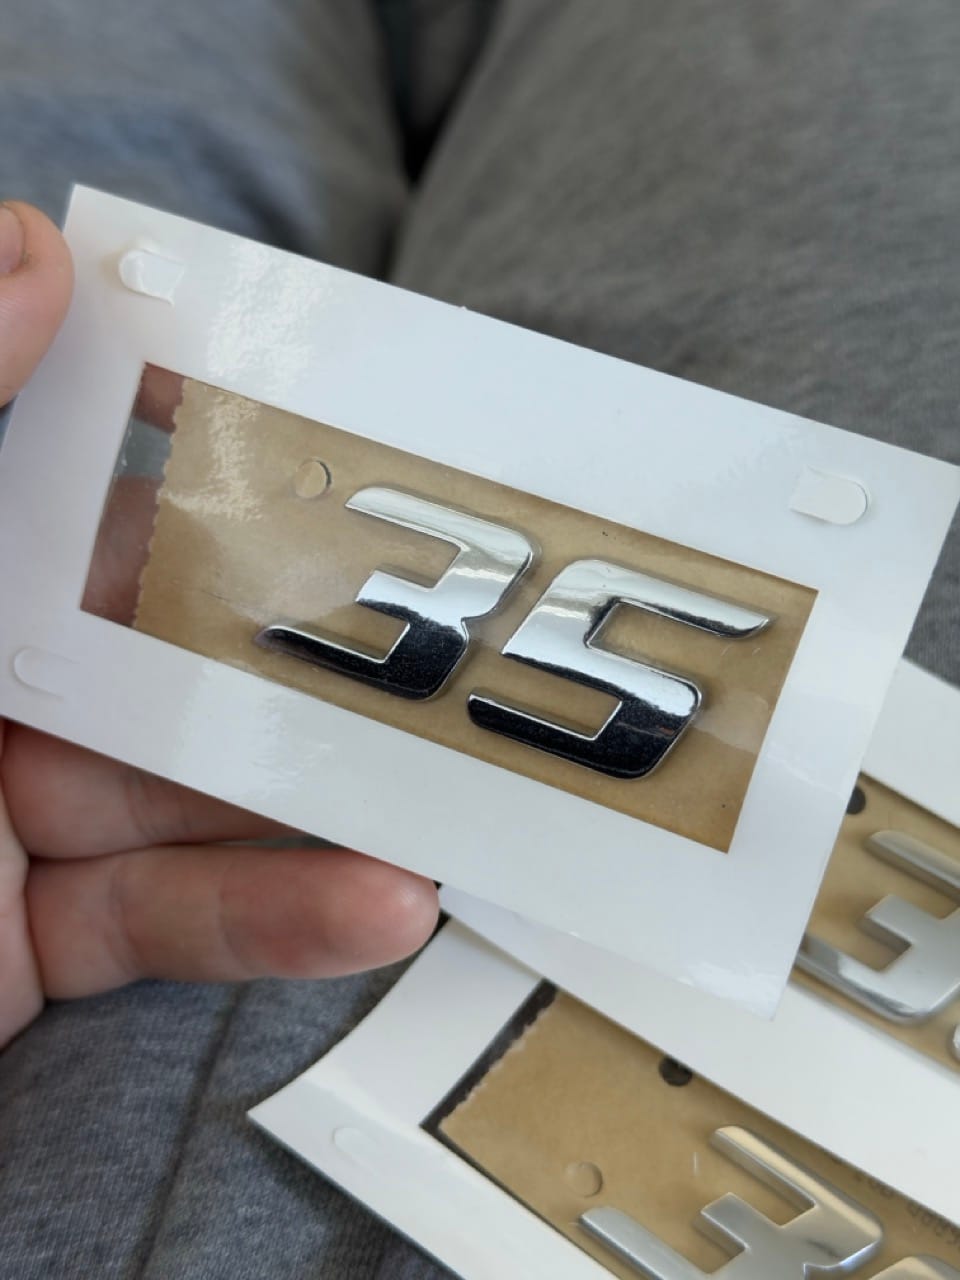
But the best part for me was finally seeing one of the other Norwegian Edition 35s in person.
There are not exactly many of them here, and one of the other four is located in Drammen. I did not spot it last year, which was pretty disappointing, but this year I finally got to see it.
And it still had the original badges.
I have been looking for those badges for over two years now, so seeing them in person was genuinely useful. I took a ton of photos from different angles, hoping I could maybe replicate them with 3D printing and whatever the process is called where you put a thin layer of metal on something. Electroplating? Something like that.
Then something even better happened later.
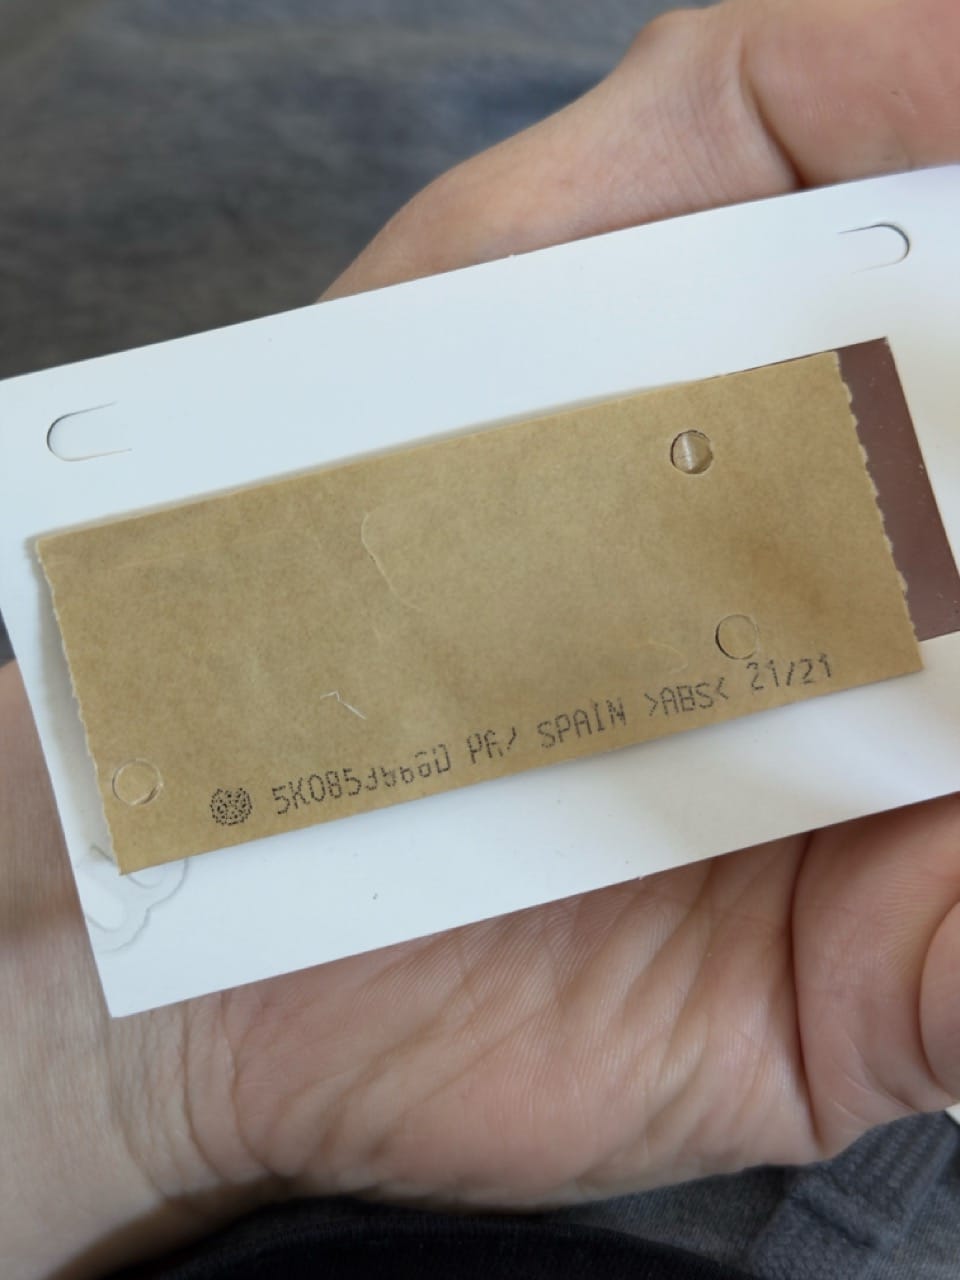
I finally managed to get hold of original Edition 35 badges.
And I will share the secret with you:
I will leave it at that.
So that is where things stand at the moment.
The bottom end, however, is still waiting.
Again.
Hopefully the correct bearings and the new cog arrive soon, and then we can finally start putting the engine back together properly. At this point, I am very ready for the engine to stop being a collection of parts and start looking like something that might actually run again.